

Normally you will put your data in onedrive/sharepoint/teams. But when you have got a lot of Data which should be archived, you can put it on a Azure File share as an example
But of course the SMB port 445, is being blocked outbound on most ISP’s. Of course you can think of solutions with VPN’s. But just a thought, why not using a Https connection to map a network drive to it? With this approach, you can make a connection from azure ad joined device to the Archive data.
Requirements:
- Azure subscription
- Virtual Domain Controller
- Azure ad Joined Device
- Certificate
Here is how I created my test setup
Step 1: Build a Azure VM with AD services installed on it.
Step 2: Run the script to create all users from your tenant on your new virtual domain controller. After all users are created, run the Azure ad Connect setup wizard.
Step 3: Install IIS/Webdav on the same or new server, make sure you select Windows Authentication to be installed. Also make sure you forward https to the server. And create an external FQDN for it.
Step 4: Create A new storage account on Azure and make sure you assign permissions, so the domain vnet of the domain controller can access this storage account. And test the connection from the domain controller itself
Step 5: Create a new user in the Active Directory with the same username and password as in the storage account settings.
Step 6: Create a new website and assign a certificate on it. Enable webdav on the website and add authoring rule on it. Create a web.config to change the default MaxAllowedContentLength and AllowdoubleEscaping settings.
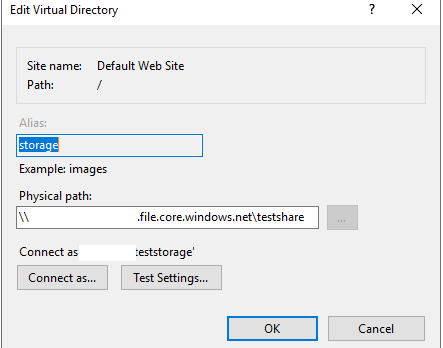
Step 7: In the website create a new Virtual Directory and make sure the Physical path is the URL of the storage account you just created in step 4.
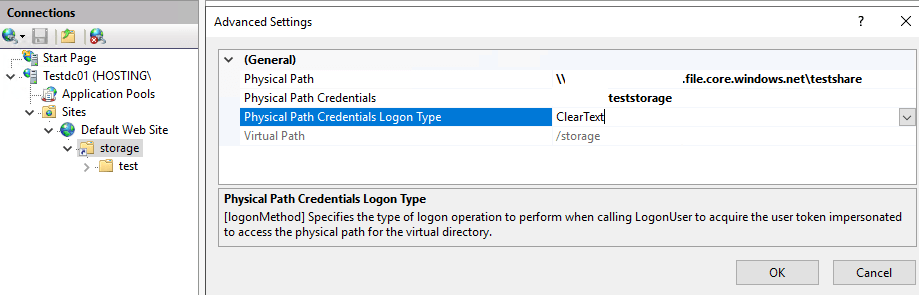
Step 8: Click on “Connect as”, to put in the credentials of the domain user you created in step 5. And of course, press “test settings” to make sure it works…
Step 9: Test if you can connect to the website from a external PC and if you can mount a drive letter to it. It will prompt you for credentials… test if you can access the share.
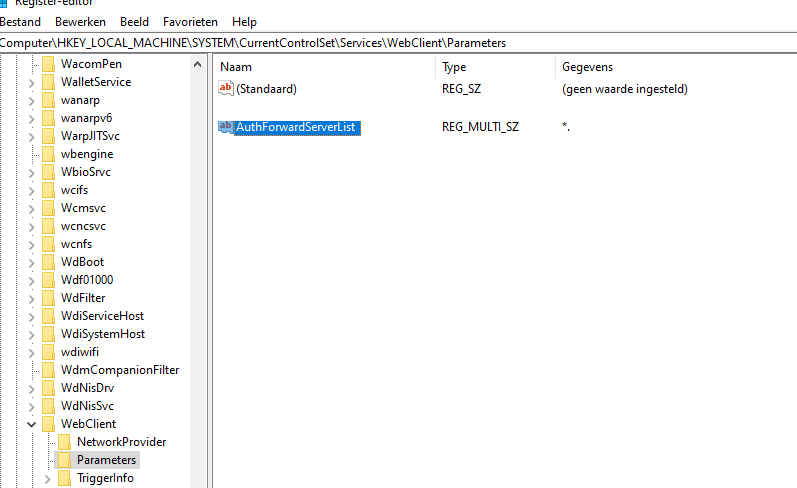
Step 10: Push some Client settings to the device/users. Create a new REG_Multi_SZ (authforwardserverlist) setting with the fqdn in it you created in step 3. Restart the webclient service after the change!!!.
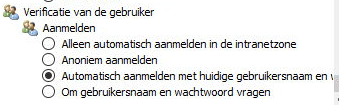
-And make sure you put the FQDN also in the trusted websites and change settings to Automatically log on with the username and password. (this also can be done with a register setting)
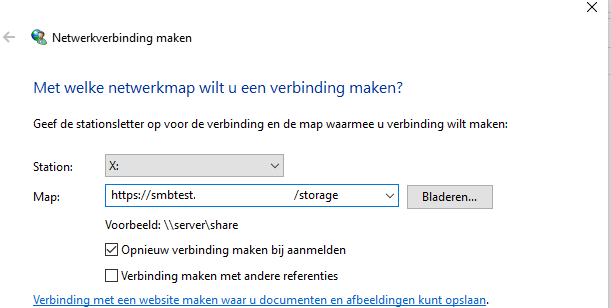
Step 11: Try it!!. Log in on your azure ad joined device and create a new mapped network drive. Enter your Microsoft 365 credentials and select “save credentials”. And you will see it connects to the webdav server and the mapped drive is still connected after a reboot with no more password prompts when you open a file.
Conclusion: Okay.. the performance is not great…it’s webdav. And it asks you for your username and password once…. But for data you rarely use… ??? Of course, there are multiple other methods….. but this also works 🙂