

So, this is my first blog post. In it, I’ll highlight the new built-in external sender tagging feature for Exchange online. I’ll also show you how to implement it, an alternative, and why I think neither is perfect. Without further ado, let’s dig in.
Some companies use Exchange transport rules to put the prepend [EXTERNAL] (or something similar) in their subject line when receiving e-mails from the outside. This can help users recognize potential phishing attempts. My company, for example, warns me when somebody from the outside uses my display name (or a co-worker’s) to send me e-mails. So, I can instantly identify the message as an attempt to bamboozle me.

Unfortunately, doing things this way has a few downsides. For example, you can end up with duplicate [EXTERNAL] prepends in your subject line when people reply inside the message chain, making subjects longer and potentially unreadable on smaller devices and so on… So, Microsoft came up with native external sender tagging for Exchange online.
How to set up external sender tagging?
Now, first you connect to Exchange using the Exchange Powershell module.
Step two is running the following command:
Set-ExternalInOutlook -Enabled $true
That’s it… You just enabled external sender tagging.
Isn’t there anything more to it? Well, yes… There is… a little.
You can use the parameter –Allowlist to specify exceptions. So you can disable external tags for certain external contacts or even entire domain. The only downside to this is that as of this moment the list can’t be bigger than 30 values. For larger companies this might not be enough.
So, what’s wrong with marking all external emails? Well, marking everyone as external users will lessen their alertness when an actual phishing email does show up. The tag loses its value, so to say.

Go take a look at this Microsoft doc. It’ll tell you everything you need to know about how to employ this solution.
Set-ExternalInOutlook (ExchangePowerShell) | Microsoft Docs
Unfortunately, at this moment it’s not possible to specify when you want to use the external sender tag. It just tags all external messages (except the ones you put on the allowlist). So in comparison to using an Exchange transport rule you don’t have any options. Also, you can’t customize the message in any way shape or form.
Let’s try it out!
So how does it look? Quite nice to be honest. As we speak the feature is available for:
- Web version of Outlook
- Outlook mobile (version 4.2111.0 and higher)
- Outlook for Mac (version 16.47 and higher)
Unfortunately, no Outlook for desktop availability yet. Insider fast builds should’ve gotten the feature in May 2021. So full on availability might be coming soon!
When using Outlook mobile you see the tag as followed:
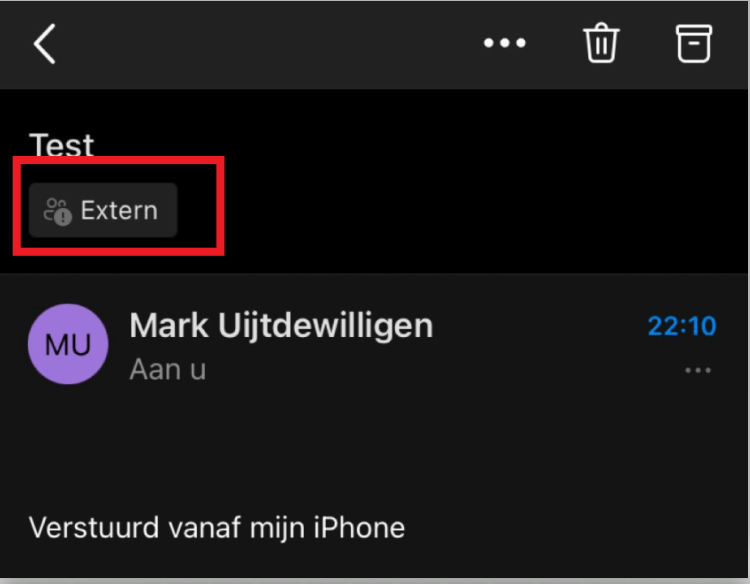
When you touch on the External (extern in the picture) you get the following explanation:
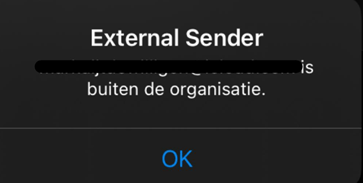
A pretty clear, although basic message noticing you the sender address is not a part of your organization.
Outlook for web gives some more options:
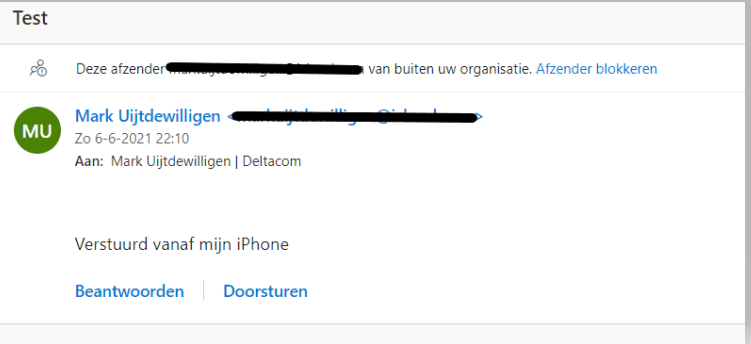
Here we do get the option to instantly block this sender.
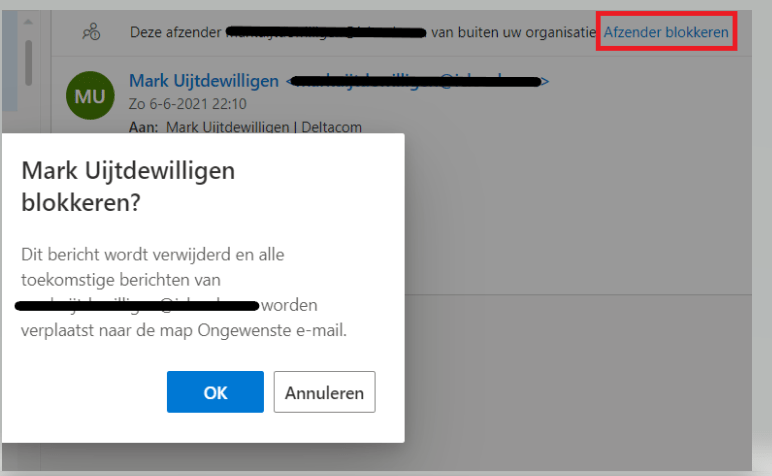
This gives our users the tools to instantly block a specific sender with 1 (well technically 2) mouseclick(s). Which I like a lot.
The alternative (old) solution.
Alternatively we can still utilize transport rules to customize our external message and also specify when we want the rule to trigger. In our organization it’s configured as followed:
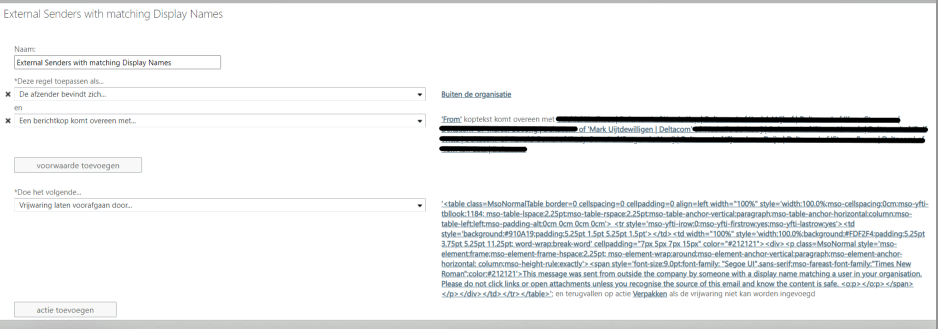
As you can see, when the from line contains my display name (or my coworkers who I crossed out), the message gets the following warning:

Now, our spam filter is configured to mark messages like these as spam so my message was quarantined. However, the ability to customize this message and not have it pop up at every external e-mail makes it more valuable as a barrier than the newly built-in feature, in my opinion.
One downside to doing things this way is that it takes a lot of maintenance to keep the rule up-to-date. At larger companies, it’s simply too much upkeep to make sure all display names are accounted for. I’d really like this to become a toggle that will auto-flag all external senders with matching display names to anyone in my organization.
Conclusion
It’s nice to see that the built-in external sender tagging feature remediates a lot of the issues companies had when using transport rules, also it’s really easy to implement. Unfortunately, the lack of customization options and not being able to specify conditions for when a tag should be provided seriously hurt this feature. It’s nice that Microsoft gave us a built-in feature, I just hope they continue to improve on it because in my opinion as it stands right now it solves one problem by sacrificing the features that make it valuable.
On the other hand we’ve seen that transport rules aren’t perfect either and possibly require a lot of upkeep. I’d really like Microsoft to expand on this feature and implement ways to customize the tooltip message and conditions in a quick and easy way. Your best bet right now might be to combine Exchange transport rules with this built-in feature to maximize its effectiveness. It’s just a shame that you need to…
Want to read more? Try out a couple of these blogs:
- Continue to Sign in Prompt Part 2: Disable the DMA SSO Compliance
- The “Continue to Sign in Prompt” That breaks the SSO
- Declarative Device Management with Intune
- Why Using a DEM Account for Windows Autopilot is a Bad Idea
- Device Query for Multiple Devices, Device Inventory, and Single Device Query: Connecting the Dots