

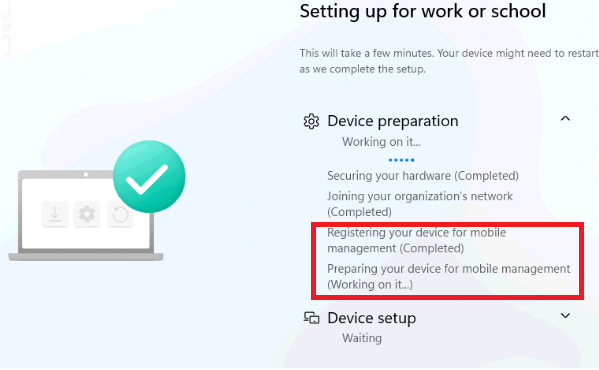
This blog will investigate what happens under the hood when our device is enrolled with Windows Autopilot during the “preparing your device for mobile device management” phase.
1. Preparing your device for mobile device management
In this blog, I will discuss a well-known enrollment process that occurs when your device is enrolled with Windows Autopilot.
Enrolling our device into Windows Autopilot will first join Entra (Joining your Organization’s network). Once it’s enrolled in Entra, the requirement to enroll the device in Intune is fulfilled.
With the requirement fulfilled, the device would start registering and enrolling the device for mobile management (MDE), AKA getting onboarded the Intune.
To understand what’s happening, we first need to examine the MS-MDE enrollment itself. The official MS-MDE flow shows that enrolling our device into Intune will take 5 steps.
- Resolve Discovery Service Address
- Discover
- Get Security Token
- GetPolicies
- RequestSecurityToken

Nothing more, and the enrollment should succeed in the end. That was simple, right? Well, shall I add Fiddler to this MDE flow to make it more understandable?
2. The Flow
Let’s take a look at the improved MDE enrollment flow I created to understand better how our device is enrolled into Intune and how it retrieves the Intune MDM Device Certificate.
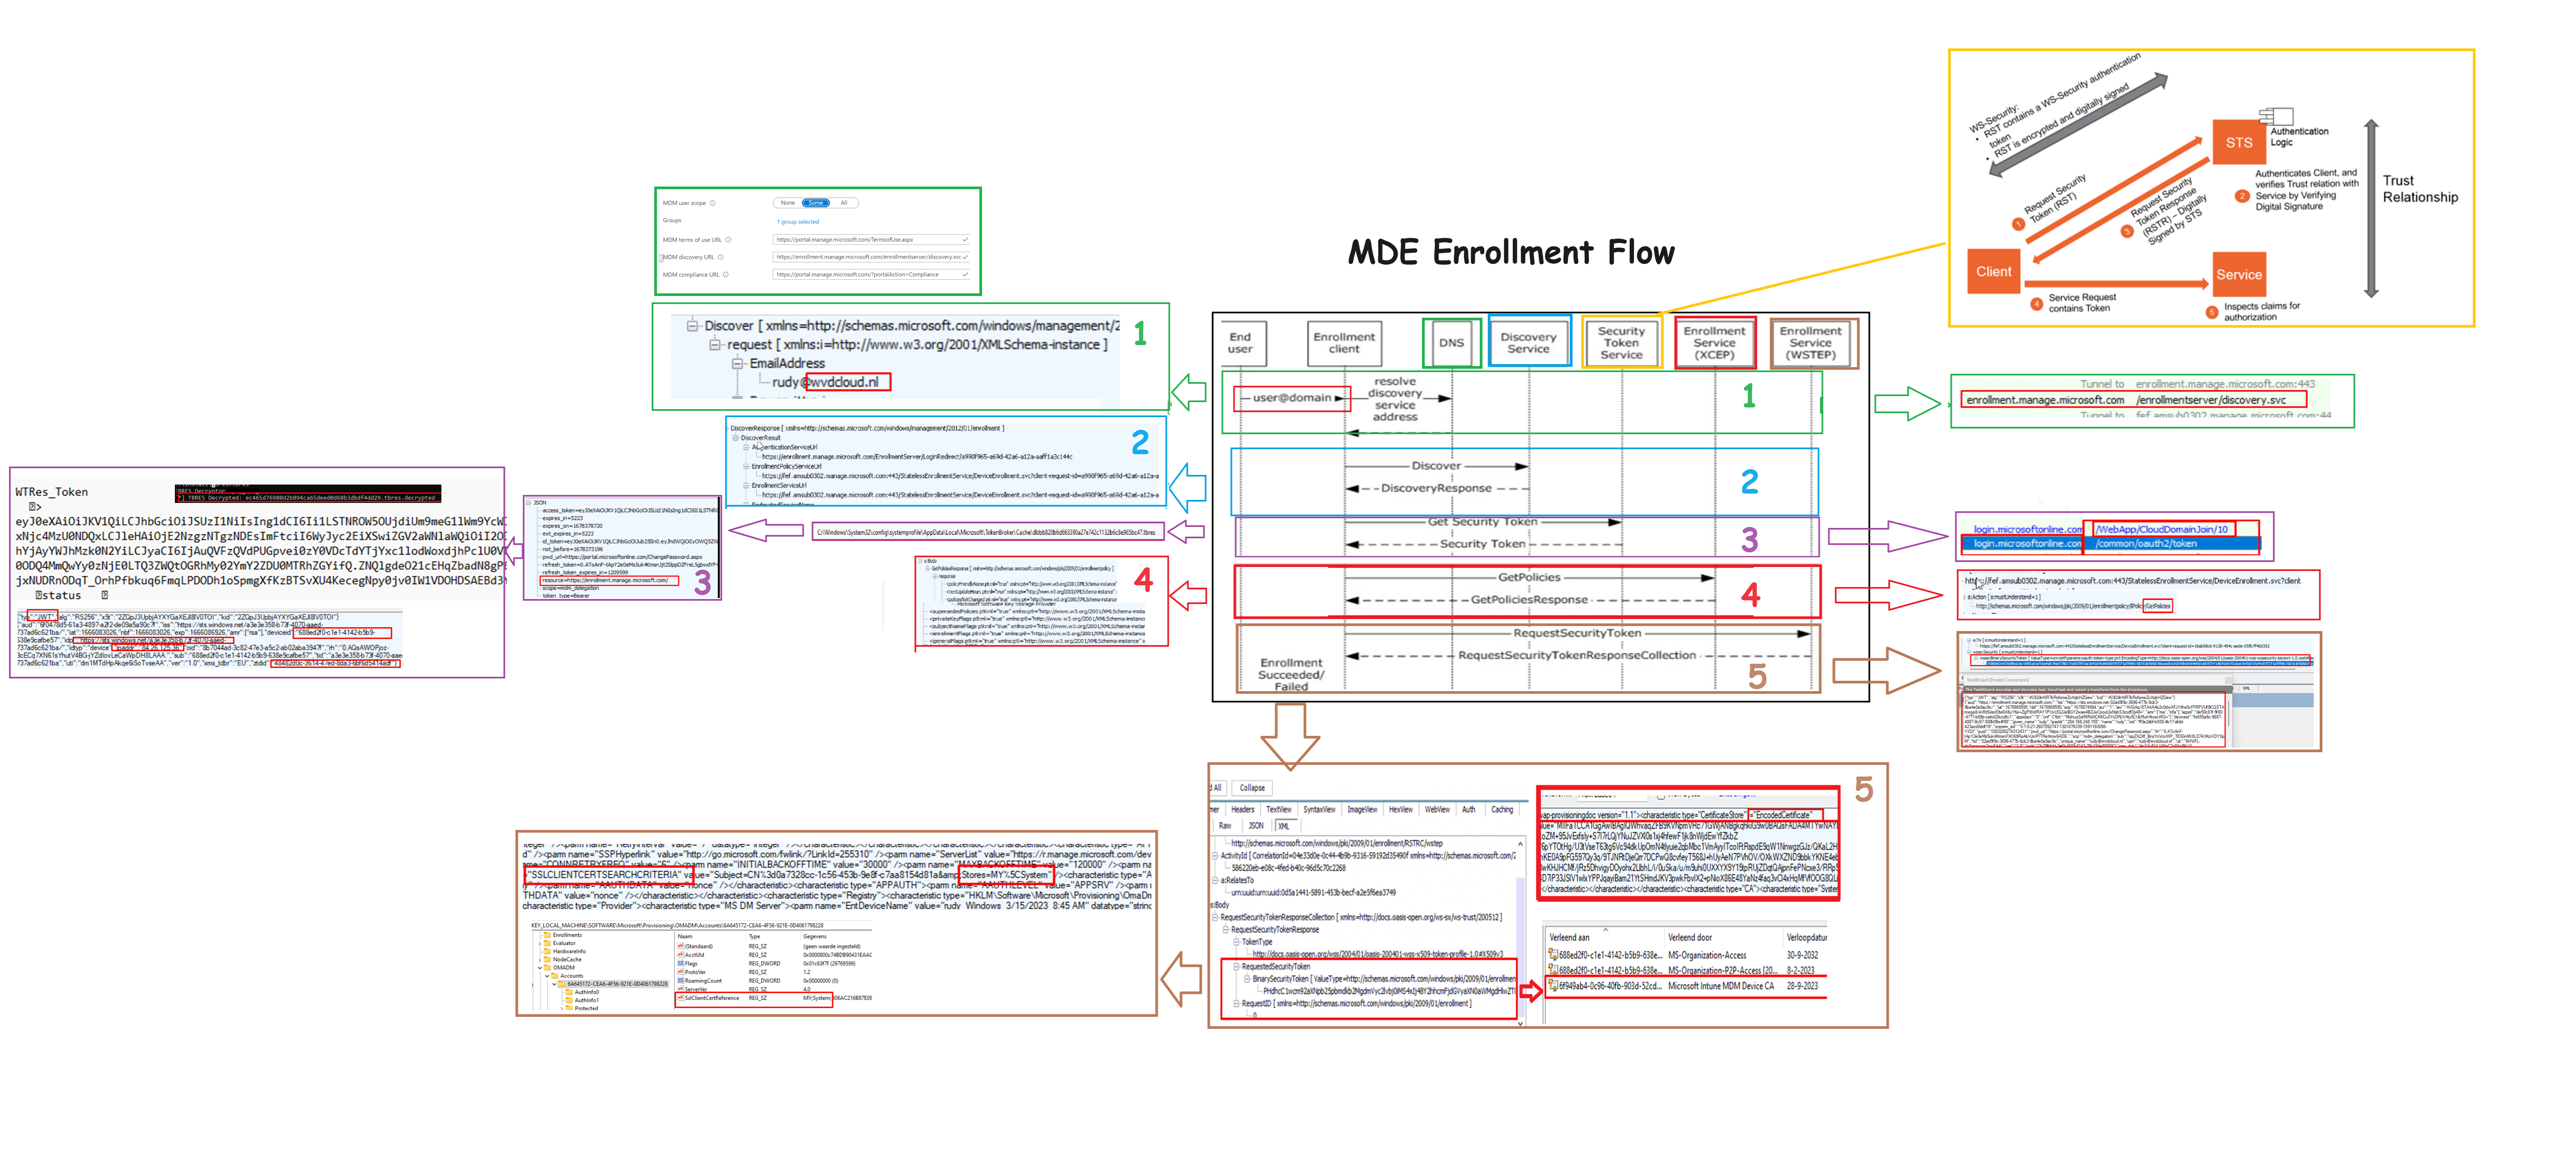
3. The Explanation
With the adjusted MDE-Flow, it also makes sense to add some explanation. To do so, I added the numbers to the flow corresponding to the numbers and phases below.
1. Resolve Discovery Service (ResolveDiscoveryService)
The first step in the mobile device enrollment shows us that entering our username during the Azure ad Join will resolve the service URI (enrollment.manage.microsoft.com). This service URI is needed to discover the actual enrollment URIs the device needs to kick off the enrollment
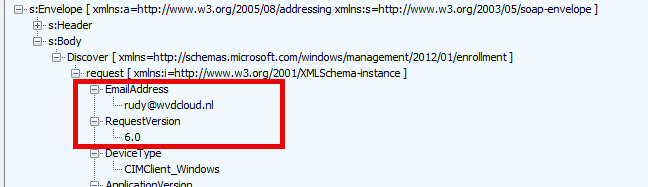
2. Discover (DiscoveryRequest)
In the second step of the MDE, the device will reach out to the discovery service by using the email address (as it only needs the domain prefix) and which enrollmentversion it requests (RequestVersion 6.0)
We will spot some similar behavior when we preprovision our device with autopilot. If you want to read more about how this happens during Preprovisioning and which fake username it uses, you must read this blog.
Autopilot Pre-Provisioning | Technical Flow V2 | Intune (call4cloud.nl)
3. Discover Response (DiscoveryResponse)
The discovery response we got back contains the real enrollment uri we need to perform the enrollment.

As shown above, the response holds all the important URLs we need for the enrollment and also the enrollmentversion 5.0

4. Security Token
Before starting the real enrollment, we need a security token to authenticate ourselves to the authenticationservice url.
We need a security token from a Security Token Service (STS) to do so. Luckily, we already got that token earlier on in the autopilot flow. `If you want to know more about how the STS works, I advise you to also read this blog.
Fetch the Autopilot Profile with PowerShell and a token (call4cloud.nl)
A fun fact…. This security token /cookie will also be cached locally on the device with a tbres extension. With some excellent tools, we can even decode that TBRES file. When looking at the decoded tbres file, we will spot another base64 encoded wtres token in it. Which we could also decode again
When decoding it again, we will spot a JSON web token in it with some additional information, such as
Deviceid, Tenantid,IP address, Zero touch device id (ztdid)
5. GetPolicies
The fourth step in the MDE flow is the GetPolicies step. The device would reach out to the enrollment service with the access token we got before (binary). The policy response contains the blueprint/template for creating a certain X509 certificate.
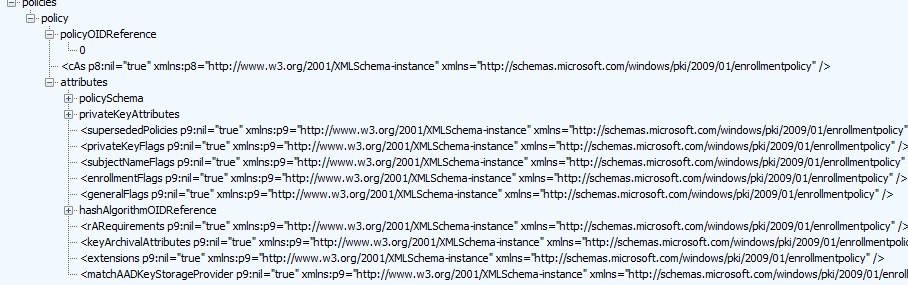
Let’s proceed to the last step to determine which X509 certificate I am referring to.
6. RequestSecurityToken
With the blueprint in our pocket, the device starts requesting a specific security token (again with the access token in the request)
In the request security token response, we will notice again a binary security token.

We could decrypt the token and search for the sentence: encoded certificate. We could fetch the base64 and export it to a certificate ourselves if we want.
$certBase64 = 'BinarySecurityTokenHere' $cert = [System.Security.Cryptography.X509Certificates.X509Certificate2]([System.Convert]::FromBase64String($certBase64)) $cert | Format-List * $Base64Cert = @( '-----BEGIN CERTIFICATE-----' [System.Convert]::ToBase64String($Cert.RawData, "InsertLineBreaks") '-----END CERTIFICATE-----' ) $Base64Cert | Out-File -FilePath c:\install\mdmcert.cer -Encoding ascii -Verbose:$VerbosePreference
When we open it, we notice that this encoded certificate is nothing more than the Intune device Certificate. This certificate secures the communication between the device and the service.
The response will also contain the location where the certificate needs to be stored, in addition to the certificate itself.

The Intune device certificate is stored on our device and in the TPM, and the enrollment is complete.
Conclusion
Knowing how the Intune enrollment kicks off during Autopilot could be helpful when you need to investigate some issues with it. Hopefully, this blog will provide a bit more information.