

In this blog, I will explore the wonders of Autopilot Device Preparation (AP-DP), from the first step of signing in to the last step in the Autopilot Device Preparation flow. I will also show you a nice new kind of flow instead of that weird Rudy Paint flow.
1. Preparing for the Enrollment
Before enrolling our devices with Autopilot Device Preparation, we must configure the Autopilot Device Preparation profile (AP-DP).
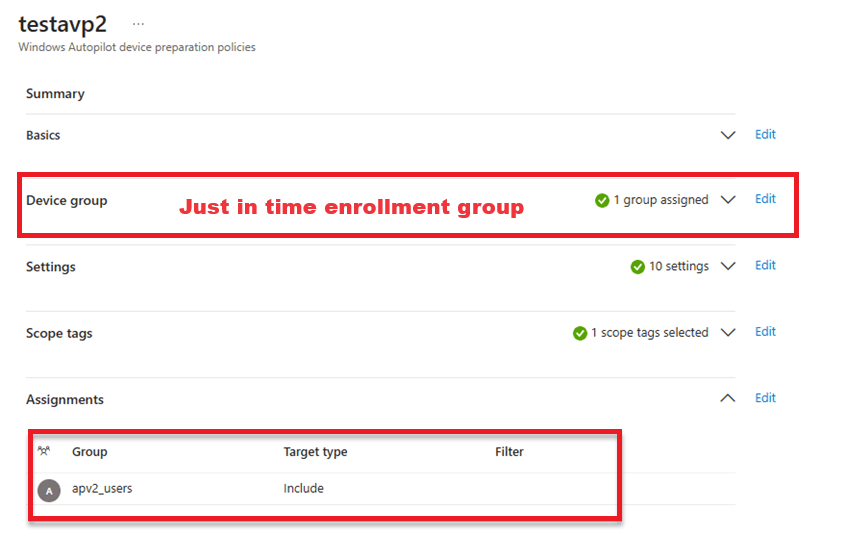
As you can see in the screenshot above, we must assign the Autopilot Profile to users, not devices! If we want to enroll a device with Autopilot Device Preparation, please ensure that you add the user to the dedicated Autopilot Device Preparation (AP-DP) user group. In my case, apv2_users.
Please read Joost’s blog for more information about configuring Autopilot Device Preparation!
https://joostgelijsteen.com/autopilot-device-preparation/
Another thing we need to be aware of is that we need to make sure that the devices that you want to onboard with Device Preparation are NOT Autopilot registered.!!

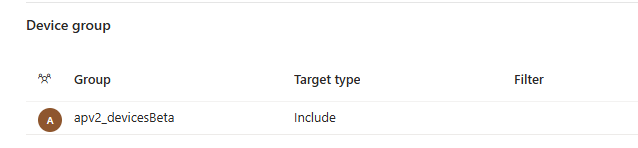
Besides making sure the user is in the proper group and there aren’t any Autopilot leftovers, make sure the apps and scripts/policies are targeted to the ADP device group(This group must be the same as you also configured in the apv2 profiles)
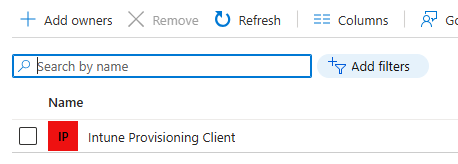
This device group needs to have the service principle “Intune Provisioning client” configured as “Owner”
Once you have met all these requirements, you must start looking at the Corporate Identifiers! When blocking personal devices with an enrollment restriction, you must use a corporate identifier if you don’t want to be blocked!
Please Note: Currently, there is a known issue with the corporate identifier in combination with Device Preparation! For now, you can’t use the corporate identifier! Its listed on the known issue page
Windows Autopilot device preparation known issues | Microsoft Learn
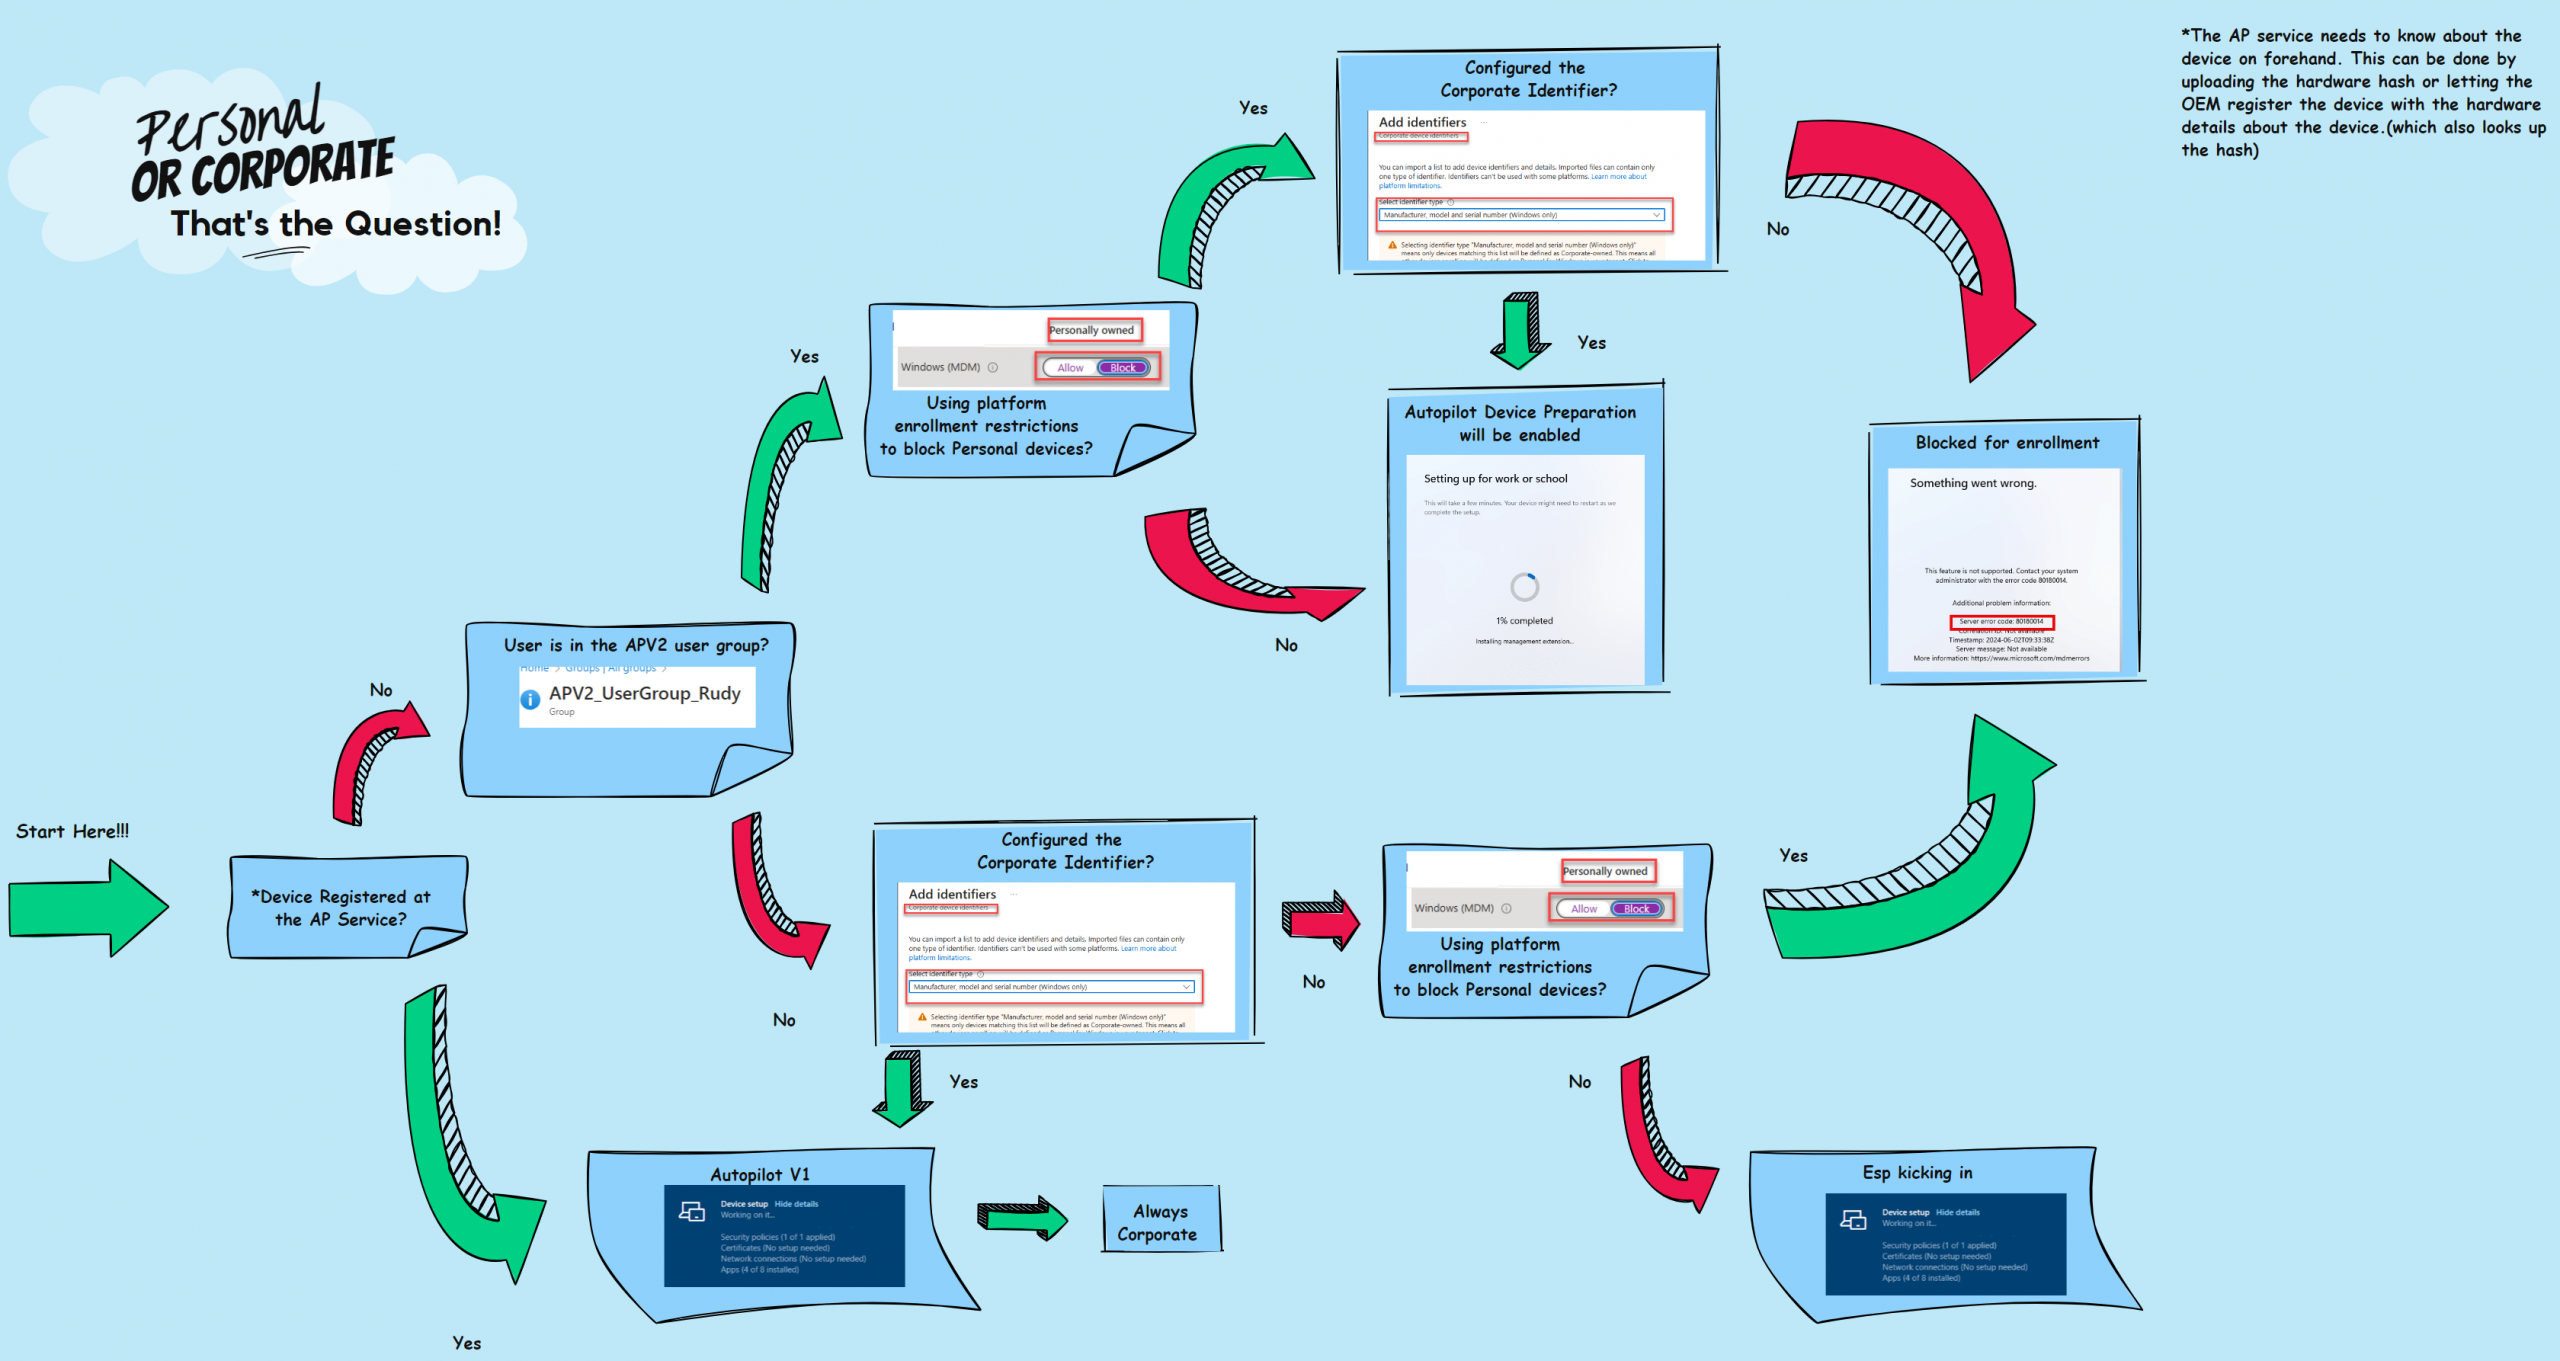
2. The Autopilot Device Preparation (AP-DP) Flow
Before going into all sorts of weird and funny details, let’s look at what I think the Autopilot Device Preparation flow looks like!
Feel free to comment if you love this flow more than the MSPaint ones!
3. The Autopilot Device Preparation Enrollment
If you have checked out the flow above, I guess it’s time to tell the whole story behind that “simple” flow.
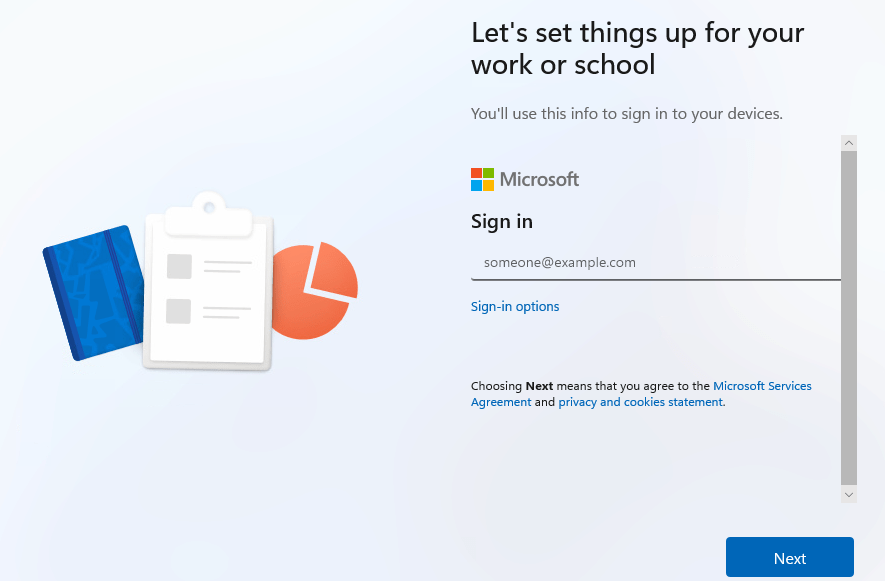
Step 1: OOBE Questions
You can sign in with your corporate credentials once you have clicked through all the OOBE questions.
Step 2: Please wait while we set up your device (Intune / Entra Enrollment)
After signing in, the Cloud Experience Web App will switch the page to “Please wait while we set up your device.”
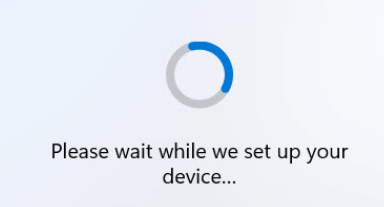
A lot of magic is happening at this step. Let me tell you what kind of magic
-The Device Joins Entra
-The device is added to the “Just in Time device group” you are targeting with apps/scripts/policies
-The device enrolls in Intune and receives all device-assigned policies (and keeps syncing with Intune)
-The device starts enrolling into MMP-C if you are using EPM.
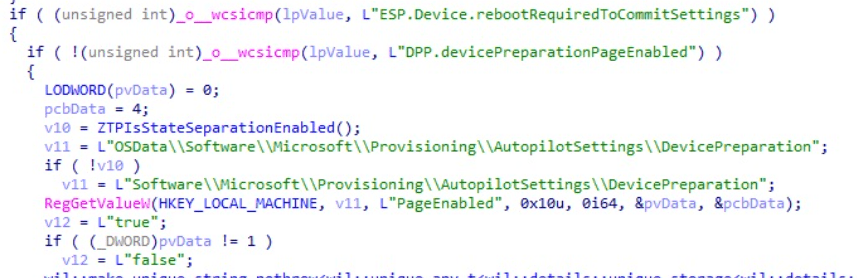
-The device receives the Autopilot Device Preparation Profile. This profile will force the device into APV2 mode (Page Enabled/Page Settings and the DevicePrepHint). The cloudexperiencehost webapp will check if the device preparation page is enabled (pageenabled = 1 )
If you want to know more about this step, please read the blog below, which contains way way more details.
https://call4cloud.nl/2024/06/autopilot-device-preparation-the-hardware-hash-voyage-home
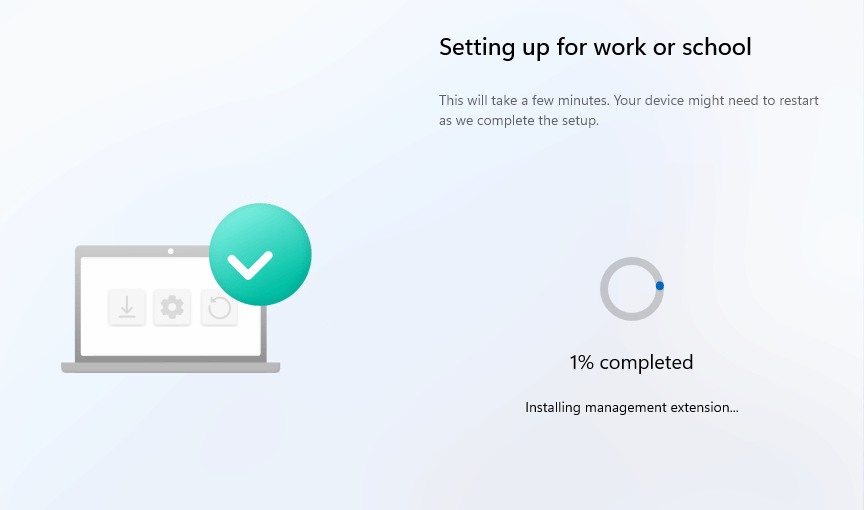
Step 3: Installing Management Extension
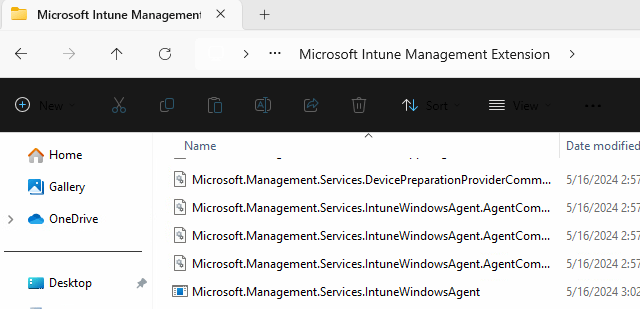
After all the steps to enroll the device into Intune and Entra are completed, a CSP will be sent to the device. This CSP instructs the device to start installing the MSIs. It will begin with the most important one: the SideCar agent, AKA the Intune Management Extension.
The device preparation page will show you that it is Installing the (Intune) management extension
Step 4: Checking if the device is in APv2 mode
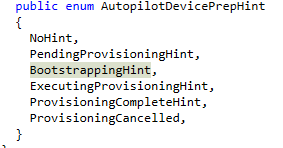
Once the IME is installed, it will check if the device is in APV2 mode by checking out the autopilotdeviceprep hint value, and if the value is 2
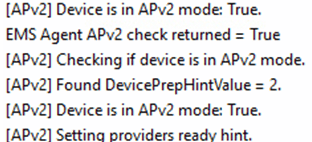
So, I assume it’s safe to say, my device was in BootStrapping Mode.
When taking a look at the corresponding code, we will notice it will use the \\root\cimv2\\mdm\dmmap\ class to put and get that Device Prep Hint setting.

If you want to know more about this beautiful deviceprephintvalue , please check out my first blog post about device preparation.

Step 5: Begin Initial provisioning
Once the IME determines if it is running in apv2 mode or not, it will begin the initial provisioning.

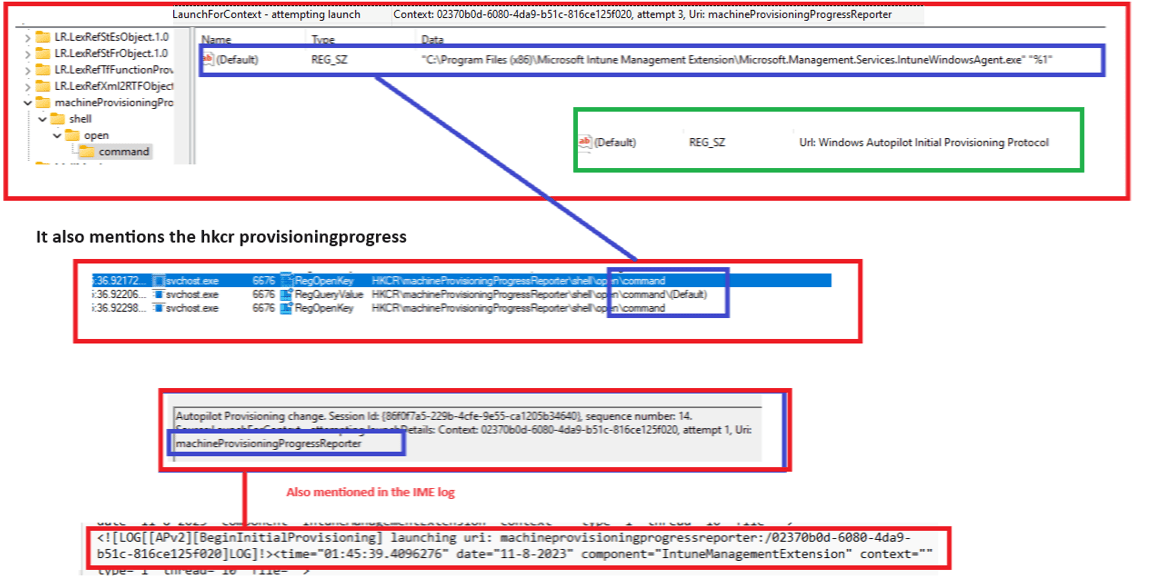
In this step, the bootstrapper contacts the service provider and launches the machine provisioning progress reporter.

It will fetch the url from the hkcr\machineprovisioningreporter\shell\open\command and will use the intunewindowsagent.exe with the %1 parameter to reach out to the service.
Step 6: Executing Standard User Provisioning Batch
Now comes the step that was missing in the IME logs. Once the initial provisioning (kicking off the progress reporter) is completed, the system knows which batch list to execute.

The first batch (batch 0) on the list is the Standard User Provisioning batch. This batch will detect if the user needs to be a standard user or administrator.

It will kick off the standarduserprovider entity and remove the user from the administrator’s group if necessary.
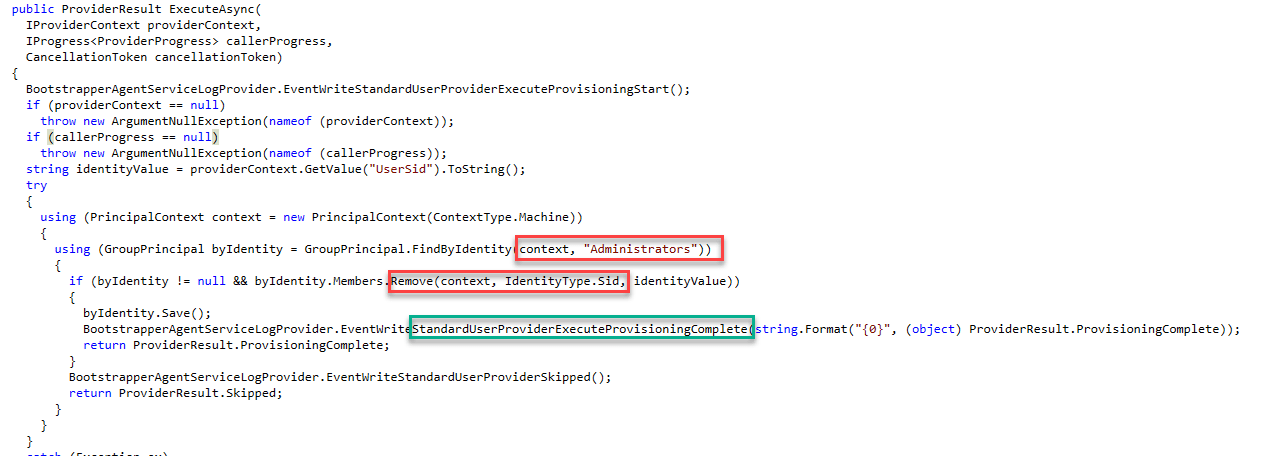
And now you are probably wondering why it needs to be removed in the first place. We configured the standard user setting in the ADP profile, right? During the Entra join in step 2, the usersid will be returned, and the user will become a member of the local admin group
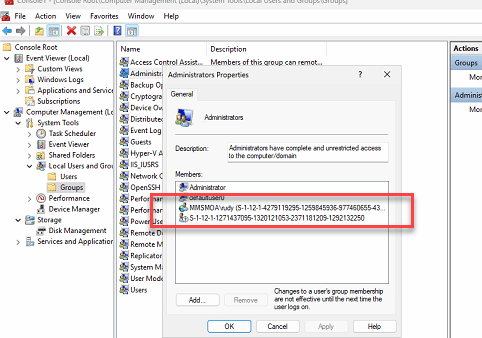
The user will be a member for a few minutes until the IME is installed, and with it, the standard user provider batch kicks off.
I must also add a petit peu note here (or a big one). If you configured this shiny new Local Administrator setting in Entra to “None” or “some,” the Device Preparation enrollment will break!
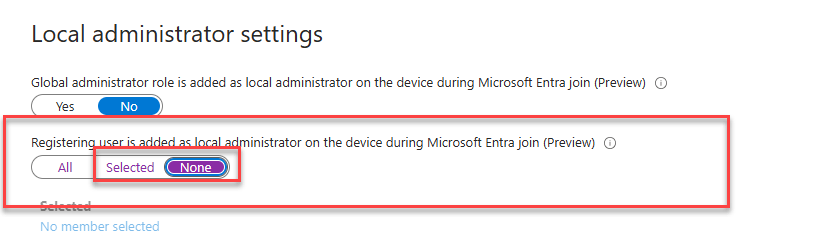
Suppose this setting is configured to None or selected. In that case, no Apps will be installed, No progress will be reported, and your Autopilot Device Preparation will be marked as a success within a couple of seconds after the IME was installed (which it is not!)
If you want to know how I found this bug, please watch out for the corresponding blog. In that blog, I will show you that after swiftly deploying the Win32 apps with the new Patch My Pc Cloud platform, I encountered an issue with the Local Administrator Settings in Entra. This Local Administrator Setting In Entra, combined with WindowsAutopilot Device Preparation, caused the device not to install any apps during enrollment.
Step 7: Executing Stateless Device Management (SLDM) Batch
Once the standarduserprovider batch checked if the enrolling user needs to be kicked out of the administrator’s group, it will proceed with the following batch number (batchnumber 1)

This batch will set the SLDM (SL? Device Management) provider hint to execute provisioning hint

Which, in fact, changes the autopilotdeviceprephint from 2 to 3

Step 8: Is Reboot Required
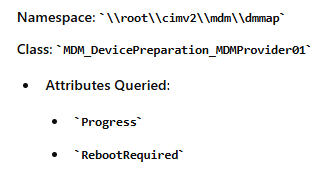
Once the sldm provider hint is set and the IME checks which state it needs to be in, (deviceprephint with the value of 3) It will start executing the workloads (in progress). This step will Query the MDM_DevicePreparation_MDMProvider01 CSP for provisioning progress and reboot requirements. (IsCoalescedRebootRequired)
If a reboot is required because you configured exploit protection, the bootstrapper will update the progress to reboot required.

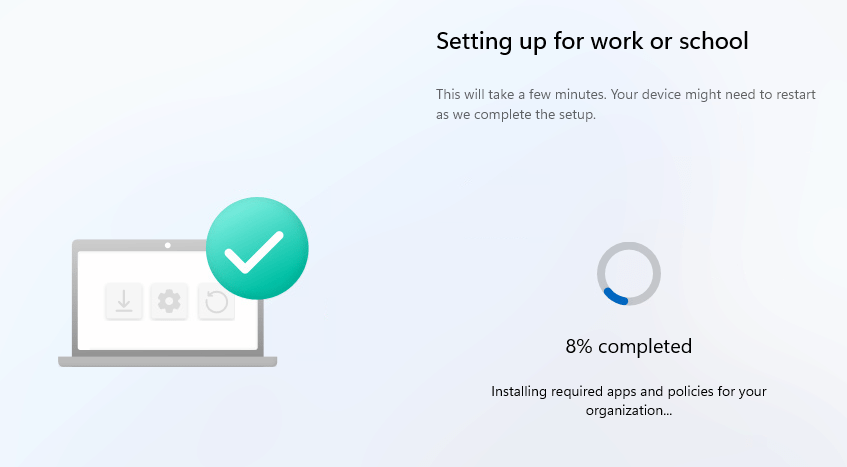
Once the bootstrapper agent checks if the device requires a reboot, the device preparation page will change to “installing required apps and policies for your organization.”
Once it switched over to this page, in the background, the PowerShell Script provisioning will start (batch3)

This batch number 2 would kick off the PowerShell scripts assigned to the device.

Step 9: Setting DevicePrepHintValue to 4 (Provisioning Complete)
Once the PowerShell scripts are executed and it is determined that “provisioning” is complete, the autopilotdeviceprephint will be changed to 4, which means provisioning is complete.


Step 10 : Switch to APv2 Checkin Flow (Start installing Win32 and Store Apps)
Once the provisioning is complete, the IME will switch to the APV2 checkin mode

Device Preparation will finally start installing the required Win32Apps and Microsoft Store Apps in this check-in mode.
With the win32apps and store apps installed, it will check if the PowerShell and App provisioning is complete.


Once the Win32app and Powershell provisioning is complete, it will send the Win32 reports (results) to the service.

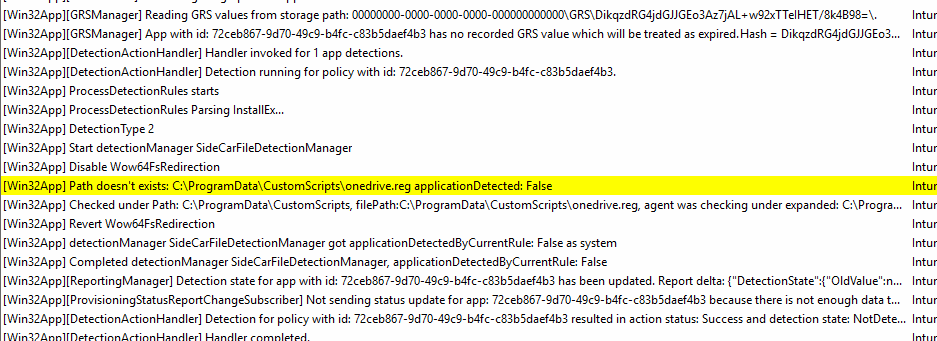
We can spot the same results in the “reporting” node of the intunemanagementextension\win32apps registry key.

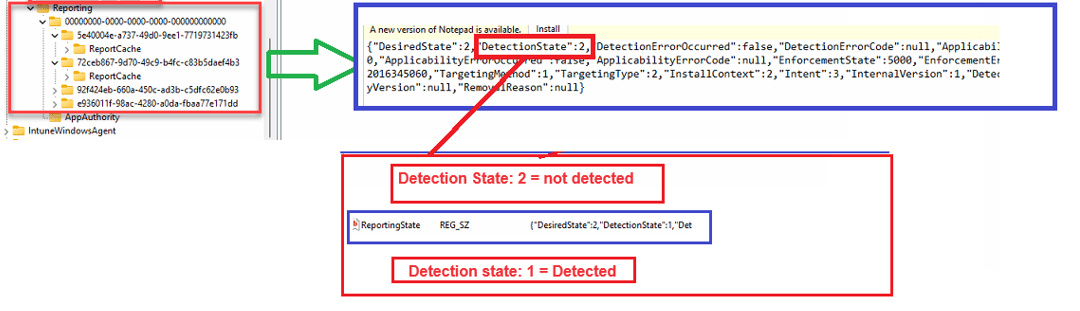
In this reporting registry node, we can easily spot if the Win32App is detected or not detected.
Step 11: Disabling APv2 Mode
If everything checked out and you didn’t run into any issues, Apv2 mode will be disabled, and with it, the deviceprephint value will be set to 0

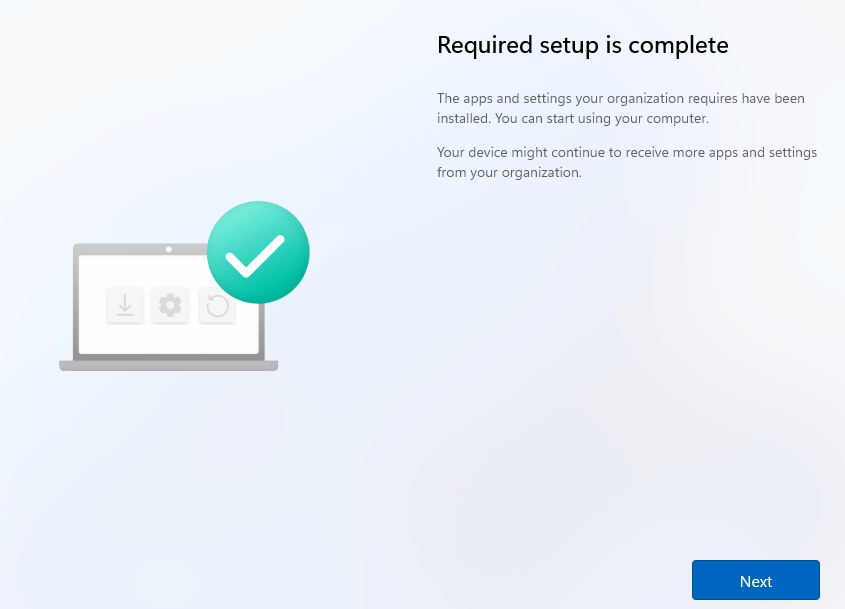
With Apv2 successfully disabled, the required setup is complete! This screen shows that the Device Preparation enrollment is finished! Hooray!!!
Conclusion
Hopefully, this Autopilot Device Preparation blog showed you what is happening in the background, which could be helpful when you encounter deployment issues in the future!
Great writeup but it is nearly impossible to read the text in the workflows.
Did you also tried downloading it, as it will give you a better version. please let me know if its still not visible on it
Hello, how did you get this code please ?
https://call4cloud.nl/wp-content/uploads/2024/05/afbeelding-met-tekst-lettertype-schermopname-au-2.png
Which tool do you use ? Ida ? Fiddler ? Other ?
https://learn.microsoft.com/en-us/intune/intune-service/enrollment/corporate-identifiers-add#add-windows-corporate-identifiers
Is there a way to bulk enroll this from the reseller’s end?
Usually, when customers order a laptop, they get it pre-enrolled with Autopilot. Does Autopilot V2 have similar features?