Actually importing reports into SSRS is a fairly trivial process: just click the Upload File button in the SSRS web portal and select the .rdl file.

There are two problems to deal with though:
- Most reports contain embedded data sources that are specific to the SSRS instance that the RDL was exported from.
- Many reports have links to other reports using fully-qualified paths or paths to folders that existed on the source SSRS instance but not the destination.
The first issue above can be dealt with after importing the RDL: How to Change the SSRS Datasource. Alternatively you can open the report in Report Builder after importing it and change the data source there; the former method is quicker though. However, do you really want to do this if you are importing multiple reports?
The second issue above requires you to open the report in Report Builder and find every link and change it. Links can exist on many different objects and object types in the report so this can be tedious and is subject to some trial and error. And, as with the last issue, do you really want to do this if you are importing multiple reports?
No is the answer to both of the questions. So what’s the solution here?
Automate! That’s always the right answer btw.
The RDL files are just XML (and thus clear text). So, we could of course use PowerShell (always a good choice when automating) to do some find and replace operations or we could use a tool designed specifically for replacing text in files. I chose the latter for this post in the form of the open source GrepWin but the former is of course valid.
For this post, I’m importing the awesome software updates compliance reports from Gary Simmons. There are 11 total of these.
Data Source
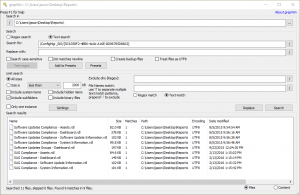
The first step is changing the data source. Opening any of these RDL files in a text editor, you’ll quickly see near the top an XML element for the DataSource and a sub-element for the DataSourceReference. We can clearly see that this is specific to the site that Gary was working off of as it has his site code embedded in it: SI0. The GUID following ConfigMgr_S10, {5C6358F2-4BB6-4a1b-A16E-8D96795D8602}, is interestingly enough the same on every ConfigMgr site so we don’t actually have to change it.
If you feel the need to verify that the GUID is in fact the same on your site, perform the following:
- Open the SSRS portal in your browser of choice.
- Open the ConfigMgr_<sitecode> folder.
- Choose Details View (under the search box near the top right).

- Scroll all the way down to the last item with a database icon next to it. That’s the common ConfigMgr data source and the name displayed is its GUID which is, as noted, the same.

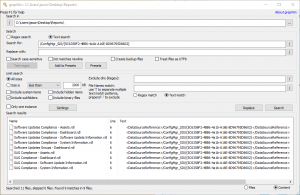
OK, so now all we have to do is change S10 to your site code. I like to be a bit more specific than this just in case S10 appears somewhere else in the RDL. Thus, a better, precisely targeted strategy is to replace /ConfigMgr_SI0/{5C6358F2-4BB6-4a1b-A16E-8D96795D8602} with /ConfigMgr_<sitecode>/{5C6358F2-4BB6-4a1b-A16E-8D96795D8602}.
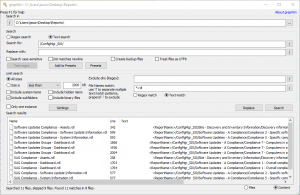
This is cake for GrepWin. It even lets you preview the results before you make any changes by selecting the Content radio button on the bottom right. It will also make backup copies automatically if you so choose. While I love PowerShell, this would take a little while to code and longer to truly test. In this case WinGrep FTW.


Easy peasy.
Report Links
Handling report links is pretty much the same thing, you just have to find the text to replace.
For this, there are two kinds of links:
- Links to built-in ConfigMgr reports.
This one is easy because we know the path to built in reports is /ConfigMgr_<sitecode>/. Thus, just replace this string with the one containing the site code for your site. Note that this would have also handled the data source from above, but I like doing it separately as it allows me to validate each replace. Speaking of validation, make sure that this one is only replacing text inside of ReportName elements.

- Links to other custom reports.
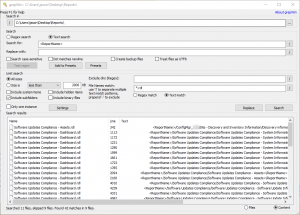
This one is slightly more difficult to handle — but only slightly. First you need to find all of the report link references; luckily these are all contained in ReportName elements so a simple search for these will reveal all of the paths.

In the case of the reports by Gary, all of the links to custom reports are to his other reports and all of these are in a top level-folder (at the same level as the ConfigMgr_<sitecode> folder) called Software Updates Compliance. If you are comfortable with placing the reports in this folder, then you don’t need to change anything in the RDLs; just upload them to a custom folder named this at the top-level. I, however, like placing my custom reports in a custom folder inside of the ConfigMgr_<sitecode> folder so that they show up in the ConfigMgr console.
Another search and replace is in order here: replace /Software Updates Compliance/ with whatever path you will be adding the reports to. In my case, it’s usually something like /ConfigMgr_<sitecode>/_<CustomerName>/Software Updates Dashboards/ (the underscore is there to put this folder at the top when sorting the folders by name in SSRS).
Astute admins will notice that this path is a fully-qualified path and wonder whether a relative path can be used. The answer to this is yes. Thus, instead of specifying the folder at all, we can simply get rid of /Software Updates Compliance/. As long as the report referenced is in the same folder as the one referencing it, everything works as planned. This also future proofs the reports in case someone renames or relocates the folder; as long as the reports stay in the same folder, they’ll just work.
As with replacing the links to built-in reports, you should validate that you are only replacing the text inside of ReportName elements.
Upload
And, that’s it –this should honestly take you no more than a few minutes no matter how many reports that you have. Just upload the reports, run, and enjoy (unless you have terrible update compliance in which case you should get back to work and stop reading Reddit).
Note that of course uploading the reports one by one is anti-automation but is a simple task. A quick web search revealed a handful of sites with PowerShell scripts to automate uploading the RDLs. This one looked promising but I haven’t tested it: [Powershell] How to Install/deploy SSRS (rdl files) using Powershell.


