

In the rapidly evolving world of IT management, staying ahead of potential issues before they impact your users is critical. One tool that has become indispensable for me in this regard is Windows Sandbox. After using it extensively, I realized it’s time to share my experiences and insights in this blog. Windows Sandbox offers a secure, isolated environment to safely test and run applications without affecting your main system. In this post, I’ll guide you through its setup, configuration, and some advanced tips to enhance your usage. Whether you’re new to Sandbox or looking to deepen your knowledge, this blog has something for you. Let’s dive in and explore how to make the most of this powerful tool!.
1. Information About Sandbox
Windows Sandbox provides a lightweight desktop environment for safely running applications in a protected and isolated environment. You can run Sandbox on Windows 10 Pro/enterprise or Education. Software installed inside the Windows Sandbox environment remains “sandboxed” and runs separately and isolated from the host machine.
The sandbox instance is a dynamically generated image that uses the files from the host filesystem itself. Most OS files are immutable and can be freely shared with Windows Sandbox.
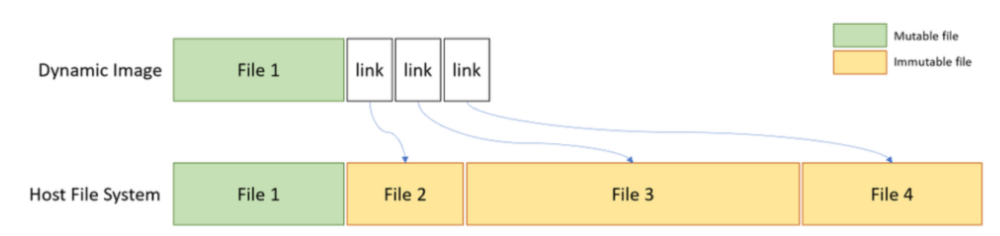
More on this (Reparse points) later.
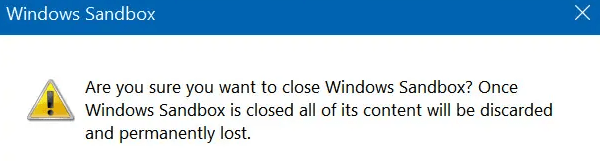
Sandbox doesn’t have persistent storage, so running Windows Sandbox is temporary. When it’s closed, all the software and files and the config is deleted. You get a brand-new sandbox instance every time you open it. But I guess that one is obvious when looking at this warning when closing Sandbox
When taking a good look at Windows Sandbox you could say it looks much like Application Guard for Office apps. WDAG also launches an Office instance in an isolated environment. And like I told in this blog about Credential Guard: “Virtualization is just like segmentation”
Now we know, Sandbox is almost the same as Windows Defender Application Guard, let’s look at what 3 components it uses to deliver us this fantastic product
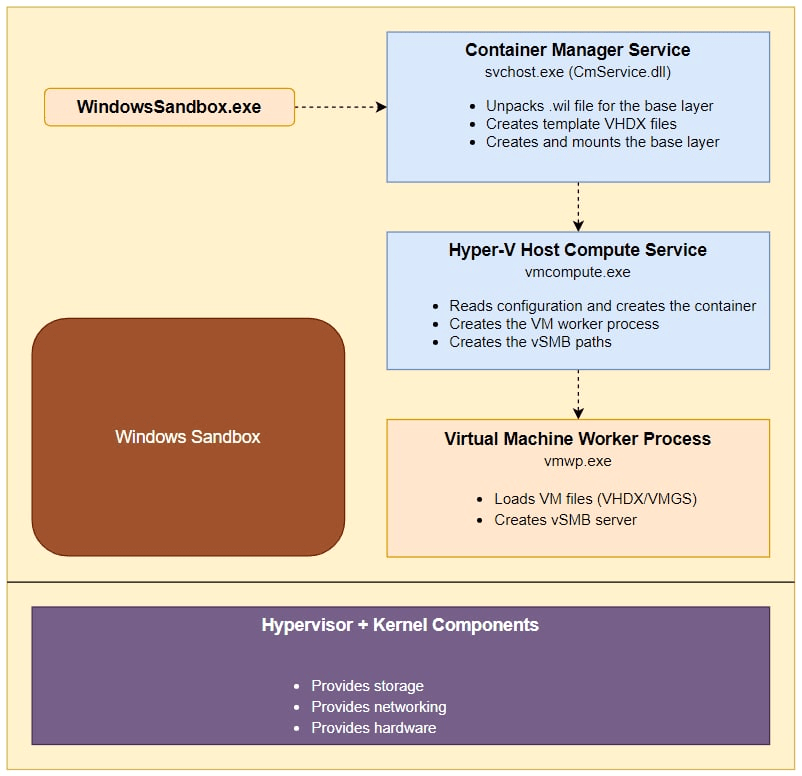
- *CMservice.DLL: Container Manager Service
- *VMcompute.exe: Hyper-V Host Compute Service
- *VMWP.exe: Virtual Machine Worker Process
You could see it for yourself by opening the task manager and take a look at all the running processes.

And by opening “services.msc” You could take a guess where CMService stands for. If that service isn’t running, Sandbox will not work!

Okay, now we are pretty sure it’s “just” a Virtual Machine, there should be a virtual hard disk somewhere with it. And yes there is, open explorer and browse to:
C:\ProgramData\Microsoft\Windows\Containers\Sandboxes
You will notice when you are not running Windows Sandbox only one folder exists, and when starting sandbox it will create a second container

Let’s try to open/mount the huge 4 MB VHDX to look at what’s inside.
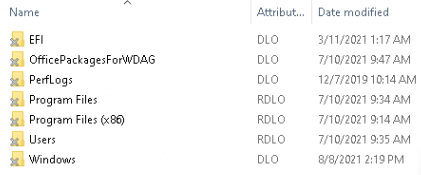
Did you notice the nice grey crosses and the attributes?
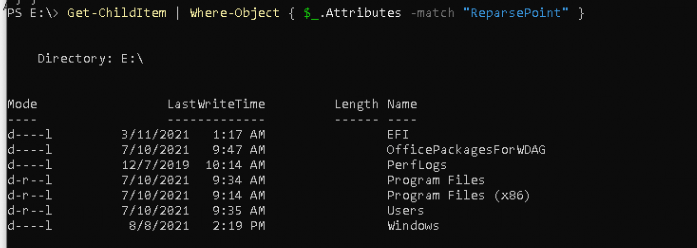
These grey crosses are telling us these folders are Reparse Points. A reparse point is best explained as a symbolic link/windows shortcut. It will make sure these folders are linked to the host itself. I guess that’s why the image isn’t that big.
Please note software and applications installed on the host aren’t directly available in the sandbox. If you need specific applications available inside the Windows Sandbox environment, they must be explicitly installed within the environment. More on this on what I am missing in Windows Sandbox and how to improve Sandbox…
2. Installation of Windows Sandbox
It’s very nice to know some background information but we still need to test it. Let’s start the installation of Sandbox.
You can open Powershell and run this command to Install Sandbox
Get-WindowsOptionalFeature -online -FeatureName Containers-DisposableClientVM
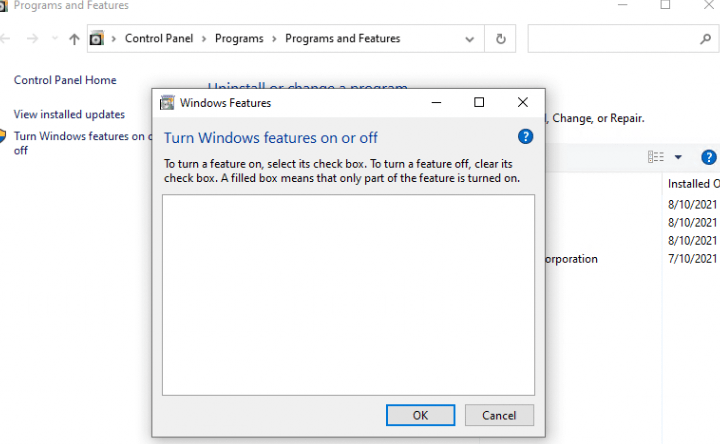
Or if you prefer the GUI option:

Of course, when you want to run sandbox inside a VM (just like me) you need to make sure hyper-v nesting is enabled
Set-VMProcessor -VMName \<VMName> -ExposeVirtualizationExtensions $true
3.How to configure Windows Sandbox?
Now we know it’s very easy to install Sandbox we need to know some background information to understand how to configure sandbox. When launching sandbox without any modifications, it will spin up a default image.
However, many times you want to redirect some folders or make sure a startup script is launched when launching sandbox. When you want to make use of some additional folders and installation media, you can use config files that allow you to customize the sandbox during startup.
The sandbox configuration files are formatted as XML and use the .wsb file extension. Of course, you can specify multiple different settings to configure the Windows Sandbox.
I guess this picture explains it all!
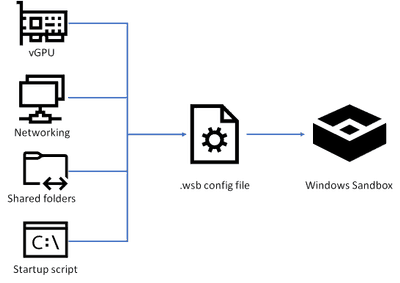
So you can configure all options you want in a WSB config file and just double-click on it to start Windows Sandbox with all your defined settings.
Let’s look at this XML file example and how to configure it
<Configuration>
<VGpu>Default</VGpu>
<Networking>Default</Networking>
<MappedFolders>
   <MappedFolder>
     <HostFolder>C:\Users\rudyooms\desktop\sandbox</HostFolder>
     <ReadOnly>true</ReadOnly>
   </MappedFolder>
</MappedFolders>
<LogonCommand>
   <Command>explorer.exe C:\users\WDAGUtilityAccount\Desktop\desktop</Command>
</LogonCommand>
</Configuration>
I will point out the 2 most important options you can configure:
Shared Folders – This will share a folder from the host with the guest, and you can specify if it has read or write permissions.
Startup Script – This script/command will be launched when a sandbox instance spins up
Let’s explain what happens when we launch sandbox with the XML configuration, I showed you above:
My desktop folder sandbox from my host machine (C:\Users\rudyooms\Desktop\sandbox) will be read-only redirected/mapped to the wdagutilityaccount desktop folder (C:\Users\WDAGUtilityAccount\Desktop\Desktop) of the sandbox guest instance.
When specifying the command “explorer.exe C:\users\WDAGUtilityAccount\Desktop\Desktop” it will open explorer in the desktop folder.
4.Adding/Changing installation files to the Sandbox Baseline
As you know by now, a new clean instance will be started when you launch sandbox. If we don’t want to use the “shared folder” option, how are we going to add some files to the baseline? There is always another way to get more sand in the sandbox!

It will only take 5 little steps
- We need to stop the CMservice I showed you earlier before we could change anything, so let’s do so.
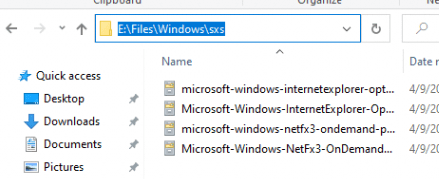
2. Open/mount/double click on the baselayer.vhdx. You can find this file inside the C:\ProgramData\Microsoft\Windows\Containers\BaseImages\guid\ folder
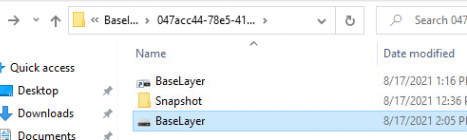
3. Add files to a specific existing folder as I show below
4. While at it we are also changing the default PowerShell execution policy, otherwise you will need to change it every time sandbox launches. To do so Open Regedit, Click/open the “HKLM” and Click on “file” and “load hive”
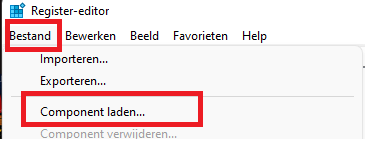
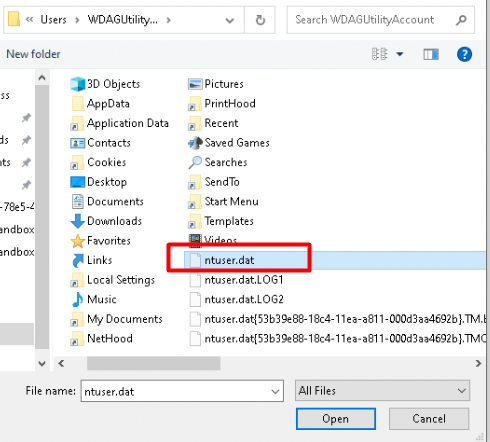
and select the “ntuser.dat” from .\Files\Users\WDAGUtilityAccount\ntuser.dat
5. Give it a name and browse to the name you gave it (in the example, I am using “testkey”)
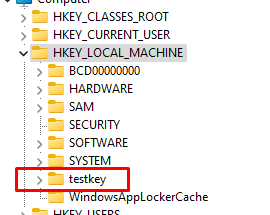
6. Create some new keys as I show below inside the software\microsoft key.
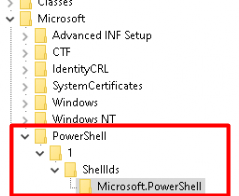
7. After you have created the keys, let’s add the strings necessary to configure the default PowerShell Execution Policy. To do this you will need to create 2 new strings: “Executionpolicy” and “Path”

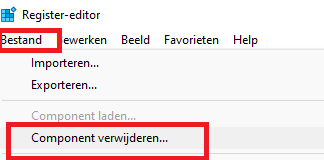
8. Make sure you unload the registry “hive” and unmount the baselayer.vhdx from your device
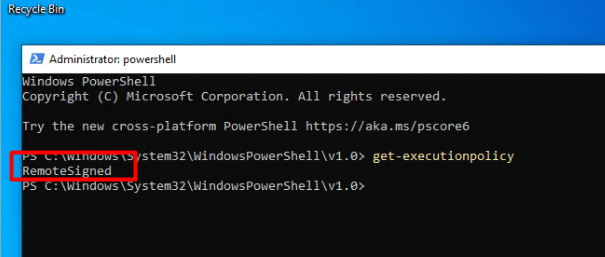
9. Start the “Cmservice” service again and open a sandbox instance and you will notice the files you added are persistent available in the container, now let’s check the default PowerShell Execution Policy!
5.Improving the use of Sandbox
As told at the beginning of this blog, I love the possibility of testing an Intunewin file in Windows Sandbox. There could only be one person who created this beautiful tool: Damien!
Download and install it now!
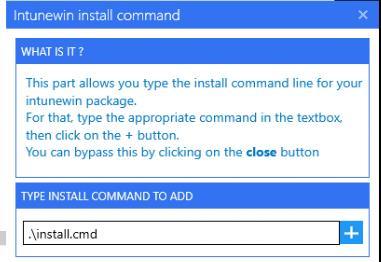
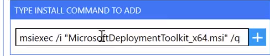
The only thing you will need to do after the installation is right-clicking on the file and click on test the intunewin in sandbox and put in the install command.

UPDATE 22-08-2021
After talking to Damien, We noticed there was some confusion about the install command. I am using PowerShell a lot! When you need to launch a Script from within a PowerShell session you will need to enter it like this: “.\ ” So I did it without even thinking…
But of course, you could also just enter the normal install command: msiexec /i “msifile.msi”/q
It will launch a sandbox instance and it will try to install the package. If it’s not working and you need to start troubleshooting why… just open Powershell as admin and browse to the “run_in_sandbox” desktop folder. You will notice the Intunewin_install script.

When running this script, it will extract the intunewin file to the c:\windows\temp\intunewin folder and from there you could continue to troubleshoot the installation even further!

I love this tool.
6. What you thought wasn’t working with Sandbox?
I think not that much, except for one very important Windows Feature! And that one important could be Dot.Net Framework 3.5.
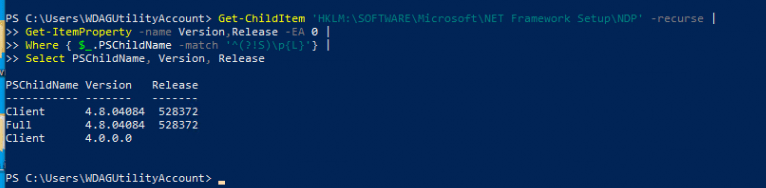
Or run PowerShell to detect which Dot.Net framework versions are installed.
Get-ChildItem ‘HKLM:\SOFTWARE\Microsoft\NET Framework Setup\NDP’ -recurse |
Get-ItemProperty -name Version,Release -EA 0 |
Where { $_.PSChildName -match ‘^(?!S)\p{L}’} |
Select PSChildName, Version, Release
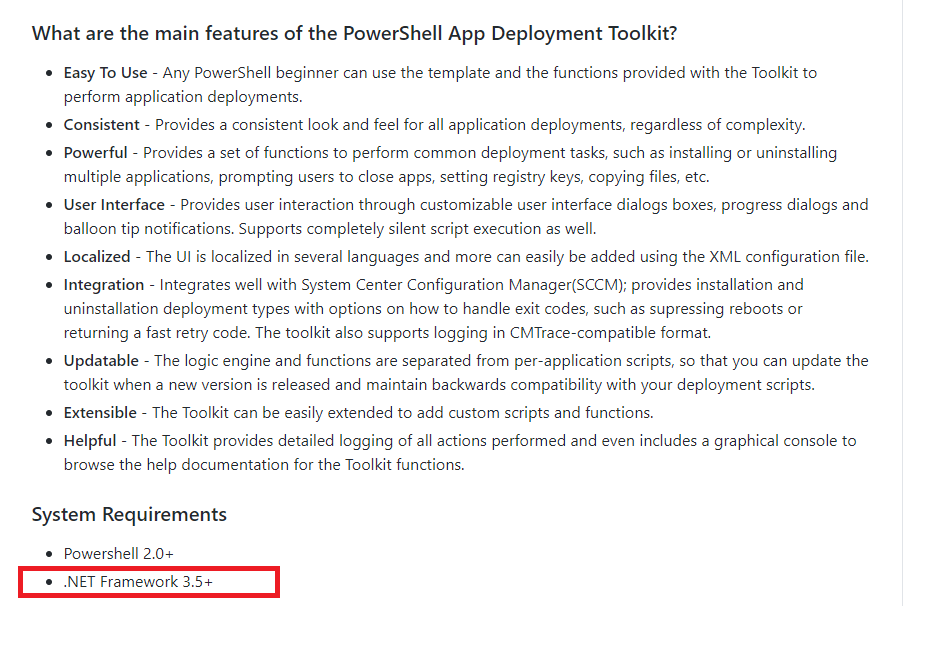
You could ask why I want/need to have Dot.net framework 3.5 inside my sandbox? There could be only one reason, you would think of: PowerShell App Deployment Toolkit (PSADT)!
So why not install Dot.Net manually? You will need to make sure you have enabled the trusted installer when you are installing additional features. You could try it for your own (even when I can tell you it’s not going to work)
Set-Service -Name "Trustedinstaller" -Status running -StartupType automatic
md c:\install
$download_url = "https://download.microsoft.com/download/2/0/E/20E90413-712F-438C-988E-FDAA79A8AC3D/dotnetfx35.exe"
$local_download_url = "c:\install\dot35.exe"

$wc = New-Object net.webclient
$wc.Downloadfile($download_url, $local_download_url)
c:\install\dot35.exe /q /norestart
Or use the DISM tool, but both will fail:
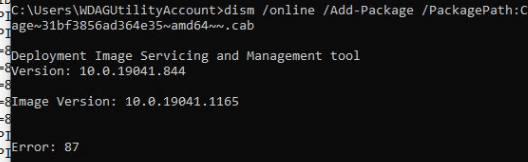
And here is why…. C:\windows may not point to a valid Windows folder…

But luckily!!, it’s a good thing when you don’t move or rename the deploy-application.exe, you don’t need to have dot.net 3.5 installed!

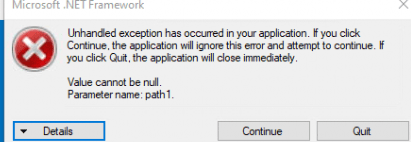
If you choose to rename or move it, it will prompt you for the Dot.net requirement. To resume, you could still test Win32 applications which are deployed with PSADT. But of course, when you are testing win32 applications with a dot.net 3.5 requirement like for example Snelstart, they will give you some dot.net framework errors!
Conclusion
When you are deploying Win32 Apps daily, you will know by now what can go wrong, but if things go south, you will need to know why. Sandbox is the way to go to test the deployment and installation of your Win32 packages even when Dot.net 3.5 is missing
I guess I am going to tell you it once again: Damien his solution is a great addon when using sandbox!

Thanks for all this. Here’s a question for you or other readers, which I’ve not found covered anywhere that I’ve looked: as you note, the .wsb config option exists to allow us to *access host files/folders from within the sandbox/guest*, but does anyone have a suggestion for the reverse: *accessing sandbox/guest folders from within the host*?
I’m wanting to compare a folder on the host to the same folder within the sandbox (once certain software is installed within the sandbox, thus affecting that folder within the guest).
I realize of course that I COULD copy/paste things out of the sandbox to the host (and vice-versa), or perhaps setup up an FTP server in the guest, and then do the comparison on the host. That’s a hassle for this need. So is installing comparison software within the guest (where the host folder COULD be accessed).
Any ideas, anyone? I’ve tried to access the sandbox folder using a UNC path from the host, and I’ve tried setting up a share. None seem to work, but I could have made a mistake, of course. Thanks.
You can map that folder, but doing so will make that folder start out as empty (Ex if you did the “Program Files” Folder it’d be empty without the tihngs that are supposed to be there upon start) but if you have a folder that is going to be filled, like a program folder “C;/Program Files\Suspicious App\” you can pre-map that folder so when the program is installed it is stored in the location on your HDD you mapped to. then you have access to it.
After the update earlier this year Windows Sandbox has been unable to access LAN addresses in the explorer, though in the browser it accesses those same addresses just fine. I’ve been keeping a system I use from doing the update for almost a year to prevent loosing that, but I have now failed to stop the update & am about to go & reinstall an old version of Windows 10 to make it once again usable. Do you know of any way to fix this issue? I have not been able to find any solutions & Microsoft support is less than useless. You seem to have the best understanding of the software that I’ve seen, so I was hoping you might be able to help
Hi,
That somehow sounds like this update (not sure)
https://docs.microsoft.com/en-us/troubleshoot/windows-server/networking/guest-access-in-smb2-is-disabled-by-default
https://dirteam.com/sander/2021/05/12/knowledgebase-you-experience-you-cant-access-this-shared-folder-because-your-organizations-security-policies-block-unauthenticated-guest-access-errors-after-applying-the-may-2021-cu/
Did you happen to take a look at the events logs ? t
Hi There I am stuck on step 4 to 9 as I can locate this .\Files\Users\WDAGUtilityAccount\ntuser.dat also when I open regedit it opens the regestry of my own pc and not the pc for the sandox any help will be much appricated
Hi, I tried to explain it a little bit better. (Updated the blog a little bit) maybe it could help you
Is there is simple (relatively) way to save a certain state of this sandbox ? say in a new vhdx or overlay that adds on to the default base vhdx.
Or am i better off just running a full win instance in hyper-v ? I was assuming sandbox might have lower system resource use.
Hi, sandbox is normally used to only test something and then removed.. if you want to test a lot in small steps, I would recommend to use a VM in hyperv. I am pretty much doing the same.. If i need to test a simple installer I use sandbox… if i need to do a lot of troubleshooting I use a VM and capture each step so I could easily revert back
Is there a way to run multiple sandboxes?
Not that I know off.. You can run multiple scripts / apps in it like Damian is explaining here
https://www.systanddeploy.com/2021/09/runinsandbox-new-version-run-multiple.html
Any chance of installing WSL2 in a sandbox?
As noted in your screenshot none of the “extra” features that can be enabled show up in the list.
Good question, I need to look into it to come up with a proper answer I guess 🙂
I created an official feature request through the Feedback Hub here https://aka.ms/AAguokc
Please go and vote it up so Microsoft understands the importance of persistent containers on Windows.
I started tinkering a bit with this and it’s SUCH a cool idea. I really love the ability to quickly test an install in Windows Sandbox.
Unfortunately, it’s falling short of being able to help me with a large portion of my use cases and I was wondering if you had any ideas for overcoming the obstacles. I’d imagine there’s actually a pretty good chance Windows Sandbox isn’t even the right solution here, but it just got me wondering what would be possible with say, a VM or something.
The two use cases I’ve been unable to work around are:
1. Testing Chocolatey installs/uninstalls requires that Chocolatey be preinstalled on the machine, something that wouldn’t be possible without baking a Chocolatey install into the PS script, which would defeat the purpose of testing it, since I’d have to remove that part of the script for it to function correctly in our actual environment where Chocolatey is already installed on our machines.
2. Testing uninstalls in general require that the application already be installed on the machine, which also isn’t really a possibility with Sandbox.
Considering the majority of my app deployments are Chocolatey installs and the majority of the issues I run into during testing are with uninstallations, these are the two things I need to test the most often and they are absolutely pain-staking to test in our live environment since there’s all the waiting for downloading, waiting for moves to the “Uninstall” group to take effect and sync to my machine, etc…
I’d really love a way to just test an INTUNEWIN deployment just as it would come down from Intune, but without all the waiting around. Any idea if something like that would be possible?
Hi, having sandbox to test stuff is great indeed… but isn’t the golden nugget for everything. Most of the time we also make sure we enroll 1 VM (windows11) into the customer its tenant… Before we test anything we create a snapshot. Install the new app manually from the company portal and if we are done we revert the snapshot..
This is very simple to achieve. In your startup script do the following:
if ($env:USERNAME -eq “WDAGUtilityAccount”) {
Set-ExecutionPolicy Bypass -Scope Process -Force; [System.Net.ServicePointManager]::SecurityProtocol = [System.Net.ServicePointManager]::SecurityProtocol -bor 3072; iex ((New-Object System.Net.WebClient).DownloadString(‘https://community.chocolatey.org/install.ps1’))
# Other Sandbox specific installs here
}
Anything inside the above test will only run if you are inside a Sandbox.
For example, say you want to install vim-console only on Sandbox, just add these 2 lines into the above Sandbox startup script:
$command = “choco install vim-console -y”
Start-Process “powershell.exe” -WindowStyle Hidden -ArgumentList “-sta -noprofile -executionpolicy unrestricted $command”
For testing uninstalls, I can automate most installs so I can test the uninstalls, for example, to test uninstalling Firefox, I would drop it inside the if ($env:USERNAME -eq “WDAGUtilityAccount”)
$command = “start /wait C:\Users\WDAGUtilityAccount\Desktop\MySandbox\FirefoxSetup.exe -ms”
Start-Process “powershell.exe” -WindowStyle Hidden -ArgumentList “-sta -noprofile -executionpolicy unrestricted $command”
Note where it is pointing to, I have setup MySandbox as a share from the Sandbox that can see outside of the Sandbox, hence you can stack up whatever you want to install there, so it’s not a pain, it’s really easy and effective.
I can also show you how to install any Windows Store app (I was quite annoyed with Sandbox until I could get Windows Terminal running) and many other Sandbox tricks if you require.
Note also that Win 11 Build 22500 onwards also support persistent Sandboxes that maintain their settings after a reboot (I use Win 10 unfortunately, so I’ve not had a chance to play with this feature).