

This blog will be about some nice new additions to the MFA authenticator app. I love the Required Numbers part, and now we can combine it with some nice MFA location information.
1. Introduction to MFA
I guess everyone now has MFA enabled for all their users, right? But why not step it up a notch because a way better option is to enable the Passwordless option like shown in this (older) blog:
I enabled that option immediately luckily this option is now also available for outlook.com / Microsoft accounts
But at first use, I had the idea it was missing something. Like some more details about the location from where I was logging in and a more secure way to acknowledge the number instead of just approving it!
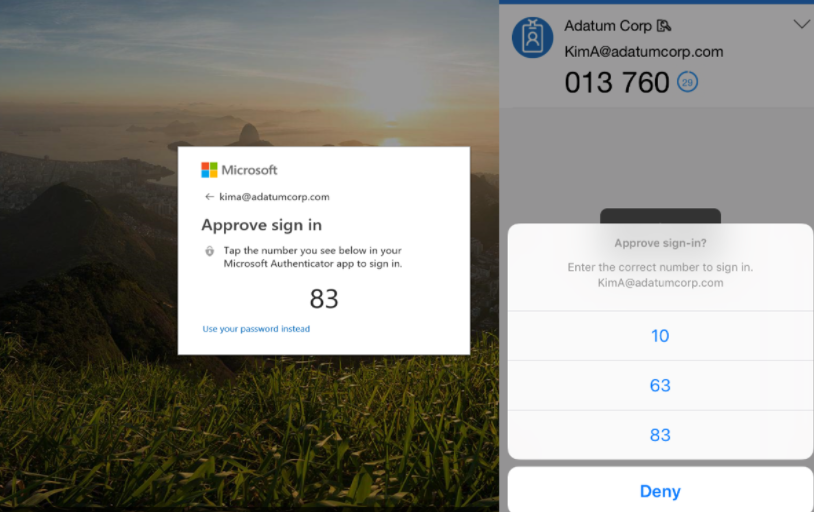
Let me explain some more because in the past, when you were receiving this MFA number question, you only needed to click on the right one and nothing more… as shown below
2. The 2 Things that are (were) Missing
So I am missing some things, let me explain them some more.
The First one:
Like I told you in the introduction, I am/was missing some security. Wouldn’t it be better when getting the MFA prompt, that you need to enter the number manually instead of just selecting one of the 3 options you get? Because it doesn’t take much thinking when you just click on the number and approve…
The Second one:
Sometimes, you can get bothered by some ghost MFA prompts. When an employee receives an MFA prompt when he wasn’t expecting it, he should normally need to contact the IT department to check it.
Here is the WHY, he/she would need to do that. When you are not using the passwordless option and you are suddenly receiving a not-expected MFA prompt, it could mean that when it’s a real attack, the attacker has your credentials! And that is something that really not be looked at and be taken slightly!
So wouldn’t it be better for the end-user he could get some more information about the MFA prompt instead of needing to contact the IT department to check it out immediately?
So, let’s examine how we could ensure that these 2 are taken care of.
3. Details about what we are going to change
Before showing you the script, we need to take a look at some details first. When do we want to enable the great possibility of requiring matching numbers and showing the user some more location information? We could use the Azure Authentication Method menu blade, right?
But unfortunately, these 2 options aren’t available in the MFA portal yet.
https://portal.azure.com/#blade/Microsoft_AAD_IAM/AuthenticationMethodsMenuBlade/AdminAuthMethods
A little (maybe big) warning!! of course, configuring these options are still in preview and not (yet) to be used in production! So please beware.
But let’s skip that warning and go forth. We need to check out the default settings first, with GRAPH. We need to use GRAPH to do so because the settings aren’t available in the Azure portal like I showed above. Let’s take a look at the default settings first.
You will find these settings in the GRAPH Uri:
https://graph.microsoft.com/beta/policies/authenticationMethodsPolicy/authenticationMethodConfigurations/microsoftAuthenticator
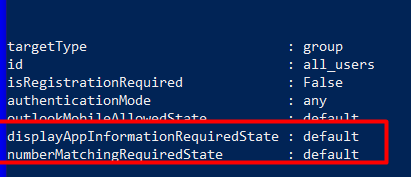
“displayAppInformationRequiredState “: “default”,
“numberMatchingRequiredState”: “default”
So both of these 2 settings are configured to “default”, I guess that just means off 🙂
4. Automating it
Of course, we can do it with Graph Explorer, but why not add it to your tenant enrollment script when it is no longer in preview?
Prerequisites. You will need to have created an app registration with some API permissions. So please add them first
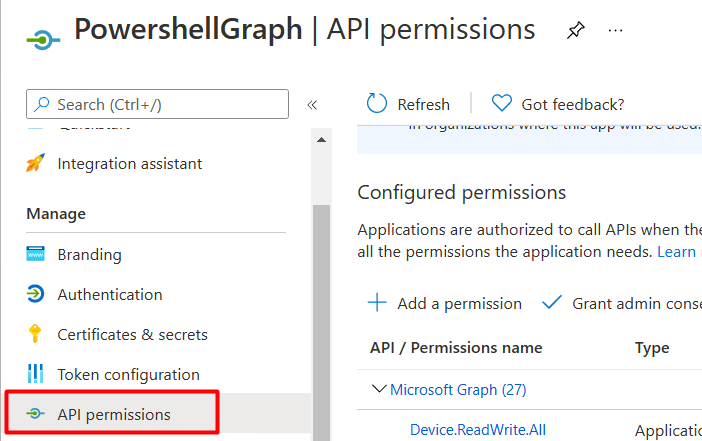
Click on Microsoft Graph and Application Permissions
Search for Policy.ReadWrite.AuthenticationMethod and add them

When the required permission is added, don’t forget to consent

5. The PowerShell Script
Now fire up a PowerShell script and copy-paste this content to change those values. Of course, you need to change the details of the App to your own app.
#configure APP Details here.

$clientid = "*"
$secret = "*"
$tenantid = "*"

#get the token
$token = Get-MsalToken -ClientId $clientid -ClientSecret (ConvertTo-SecureString $secret -AsPlainText -Force) -TenantId $tenantid -Scope 'https://graph.microsoft.com/.default'
$headers1b = @{
            'Content-Type'='application/json'
          'Authorization'="Bearer " + $token.AccessToken
         'ExpiresOn'=$token.ExpiresOn
          }


$apiurl = "https://graph.microsoft.com/beta/policies/authenticationMethodsPolicy/authenticationMethodConfigurations/microsoftAuthenticator"


$data = @'
{"@odata.context":"https://graph.microsoft.com/beta/$metadata#authenticationMethodConfigurations/$entity","@odata.type":"#microsoft.graph.microsoftAuthenticatorAuthenticationMethodConfiguration","id":"MicrosoftAuthenticator","state":"enabled","includeTargets@odata.context":"https://graph.microsoft.com/beta/$metadata#policies/authenticationMethodsPolicy/authenticationMethodConfigurations('MicrosoftAuthenticator')/microsoft.graph.microsoftAuthenticatorAuthenticationMethodConfiguration/includeTargets","includeTargets":[{"targetType":"group","id":"all_users","isRegistrationRequired":false,"authenticationMode":"any","outlookMobileAllowedState":"default","displayAppInformationRequiredState":"enabled","numberMatchingRequiredState":"enabled"}]}
'@

$Data = Invoke-RestMethod -Headers $headers1b -Uri $apiUrl -Body $data -Method patch -ContentType 'application/json'
Looking at the script above, please beware of the “patch” method. Normally I am used to just putting something, somewhere but this time I needed to patch it up!
6. Enable these previews with the GUI
Of course, when you don’t want to use Powershell but just want to enable the “Require number Matching” or/and the “Show Additional Context in notifications” you also could just open portal.azure.com
Click in “security” –> “Authentication Methods” –> Select the (of course) “Microsoft Authenticator App” And click on configure at the “all users” assignment
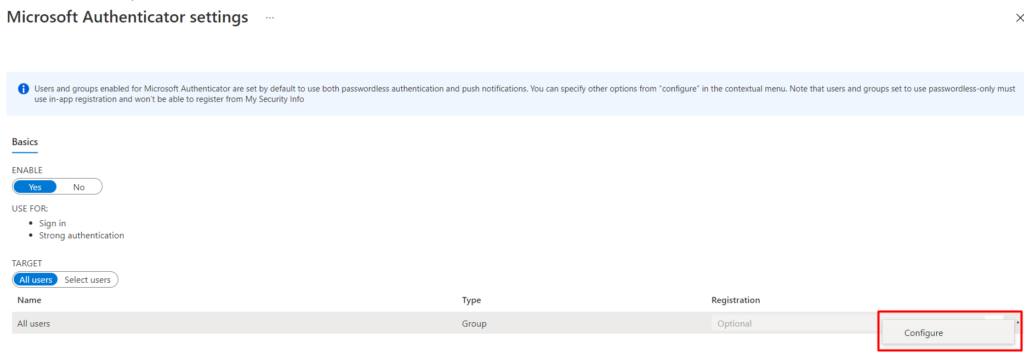
And look at here!! my ow my… Just enable it all. Again it’s in preview…. but who cares 🙂 it’s just so nice to see how easy you can enable these nice additions to the MFA Authenticator

7. Results
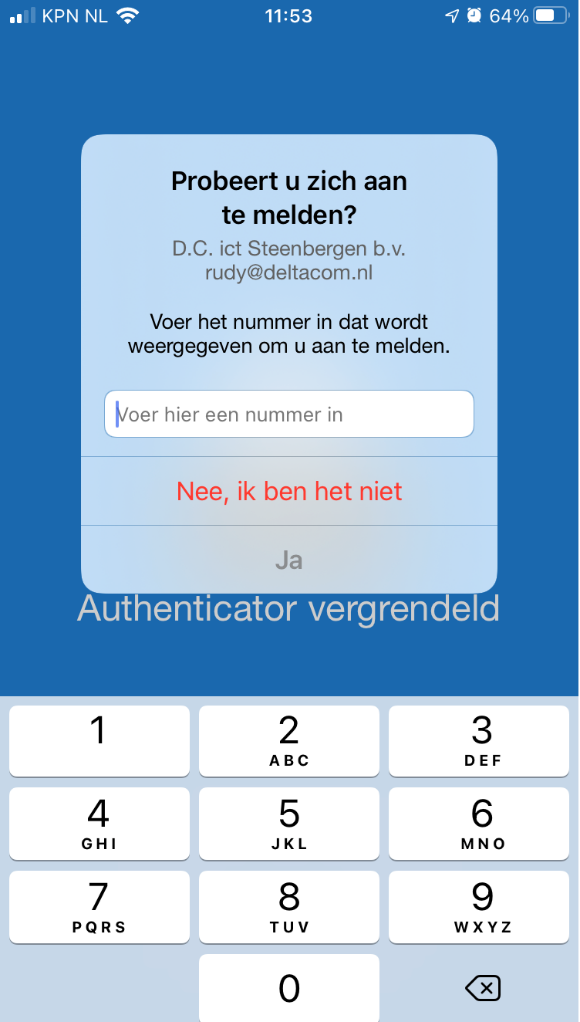
numberMatchingRequiredState (Require Number Matching)
So how does it look like when you configured the numberMatchingRequiredState value to enabled, to make sure you need to enter the number instead of just approving it!
displayAppInformationRequiredState (Show additional context in notifications)
Of course not to forget the displayAppInformationRequiredState, let’s take a look at how wonderful that one looks like and combine it with the required number adjustment
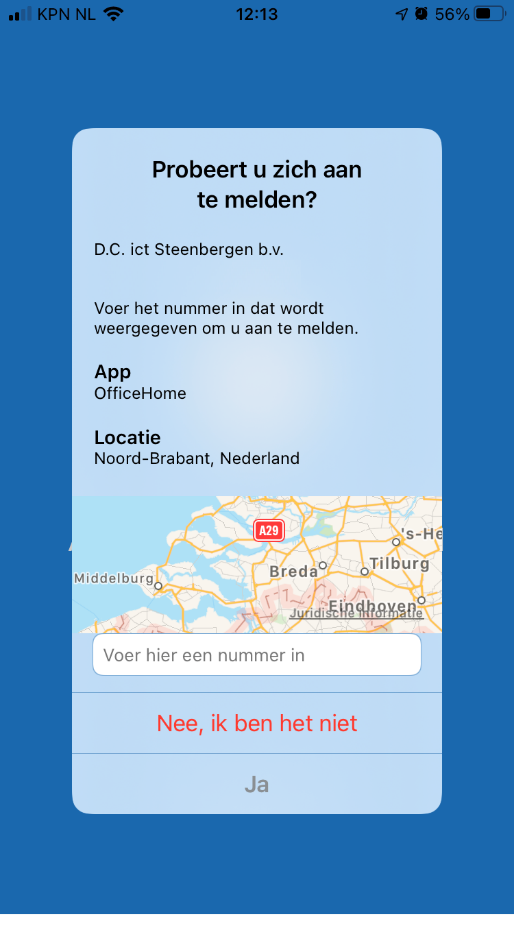
And yes, for the people looking at the details… my battery is draining very, very fast.
Conclusions
I already loved the MFA authenticator, but with these improvements, I guess I am deeply in love with it! I can’t wait to enable them in all the production environments when they are out of preview!
Enabling these options will give you a more secure environment, eliminating accidental MFA approvals, and will give you some more location insights when you are targeted by an attack on your password.
So Wakan…. uhhh…. MFA authenticator FOREVER!

When posting this blog it is was Sunday… so if you do want to do some more Sunday reading here are some nice ones for you!
Great solution and thanks for sharing. If it’s possible, can you please also publish the English version of the screenshots?
Hi,
the next time, I will try to change the language of the device first (we are used to install them in dutch :P)