

This blog will guide you through the manual configuration of AppLocker and demonstrate how to import the XML into a custom configuration profile in Intune using CSP (Configuration Service Provider). Why a CSP? We still don’t have a settings catalog to use!
What is AppLocker
First, let’s start with some background on what AppLocker is and why it’s important to configure. AppLocker is a feature within Windows that allows administrators to control which applications and executable files users can run on a device. It’s particularly useful for preventing unauthorized software from running and improving overall security by enforcing policy rules for executable files, DLLs, scripts, packaged apps, and installers.
AppLocker rules can be created based on file path, publisher information, file hash, or product version. When configured through Intune, AppLocker policies can be enforced across multiple devices via MDM (Mobile Device Management) deployment.
In one of my last blogs, I explained how to ensure access to Administrative Tools can be restricted using a GUI. It’s really simple to implement. You only need to turn it on. But… you can do more, much more.
What if I told you you could deploy a complete Applocker policy within a few seconds? In Part 2 of the blog, I will show you how to automate this with Powershell.
1. Manually configuring Applocker
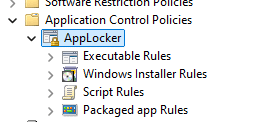
When we want to deploy an Applocker policy to our devices that are enrolled in Intune, we need to open the Group Policy Object Editor –> Computer configuration –> Windows settings –> Security settings –> Application Control Settings –> Applocker.
When you look at the categories, you will notice that the DLL is missing.
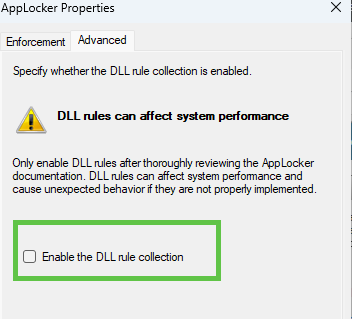
Before we proceed, we need to manually enable the DLL Rule. You could do so by right-clicking on the Applocker configuration and pressing properties.
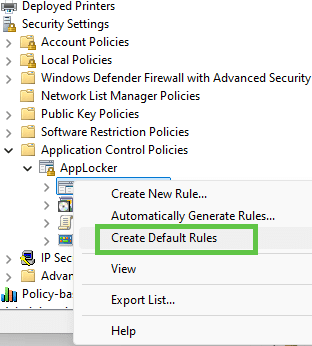
After you have enabled the DLL collection, we need to make sure we have some default rules to start with, so right-click and press: “Create default rules“. Make sure you do this for each category.
Suppose you look at the Applocker Executable rules. In that case, you will notice they contain three rules to ensure that all Windows and Program files folders and files are allowed for everyone and 1 rule to ensure that all files and folders are allowed for building administrators.

This is also your pitfall. In the default Applocker rules… All users are allowed to execute PowerShell, CMD and Regedit. Take a look at the Automation below as that one contains the hardened Applocker policy. Besides maybe blocking PowerShell for your regular users, you also want to make sure users are allowed to install/update Teams in their own user folder (which is blocked by default). The best practice is to use publisher rules. I dedicated a blog on how to do this.
https://call4cloud.nl/2021/04/exodus-teams-and-applocker
After making sure the default rules are configured for each category, we need to export the XML information before we can copy/paste it into Intune.
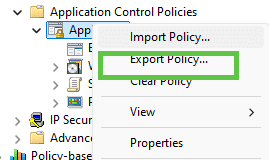
It will be exported as one big XML. You will need to divide this XML into five parts, because if you combine them as 1 XML, Intune isn’t going to accept that XML
As an example, this is the one for EXE. You will need to make sure for each rule, you copy-paste everything like below. As shown below, you only need the RuleCollection part.
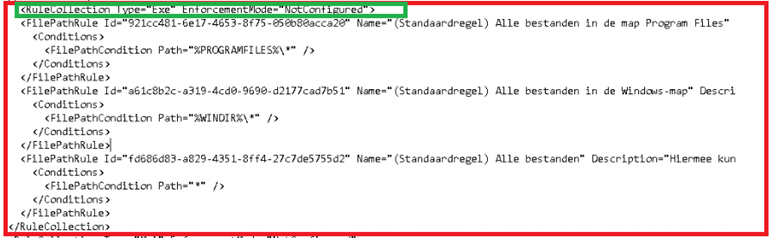
When saving those XML’s files to your device, make sure you save the XML file with the UTF-8 Encoding

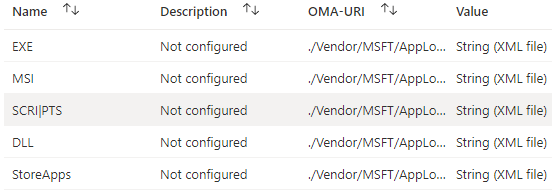
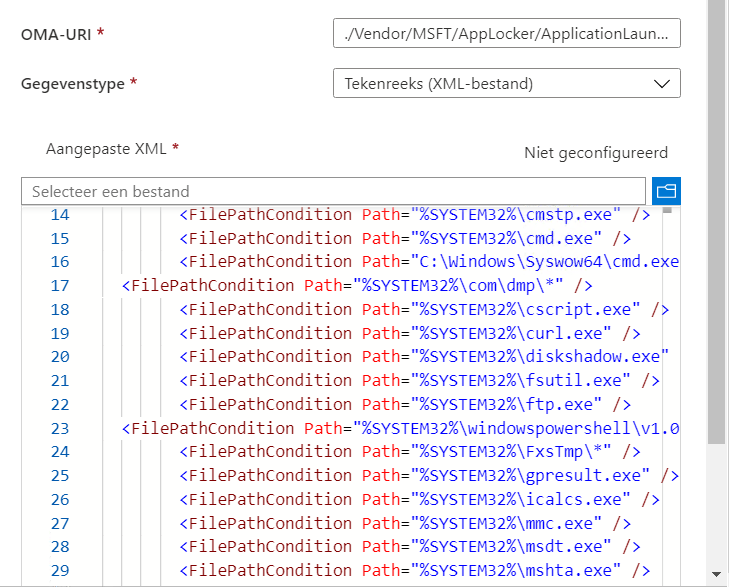
If you use the default encoding, uploading the XML will fail. Now we have the corrected formatted XMLs we need; we must also create a CSP for each category. Here are the OMA-URI’s you will need for each category
./Vendor/MSFT/AppLocker/ApplicationLaunchRestrictions/EXEGroup/EXE/Policy
./Vendor/MSFT/AppLocker/ApplicationLaunchRestrictions/MSIGroup/MSI/Policy
./Vendor/MSFT/AppLocker/ApplicationLaunchRestrictions/ScriptGroup/Script/Policy
./Vendor/MSFT/AppLocker/ApplicationLaunchRestrictions/DLLGroup/DLL/Policy
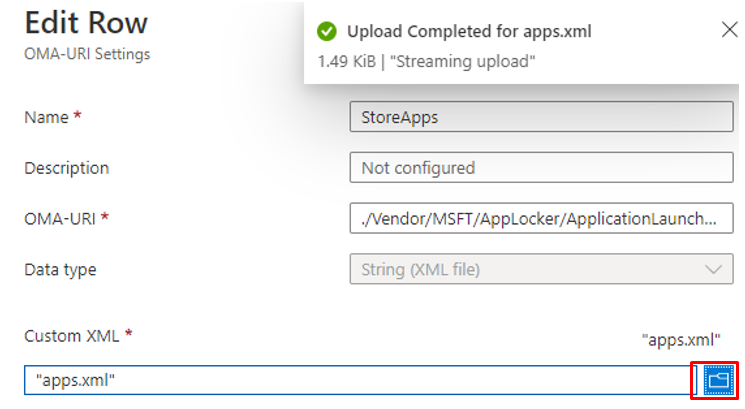
./Vendor/MSFT/AppLocker/ApplicationLaunchRestrictions/StoreAppsGroup/StoreApps/Policy
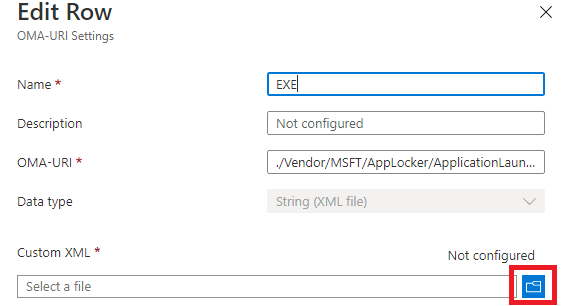
You will need to press the browse button and select the XML corresponding to the oma-uri/category.
Easy, does it, right? After importing and assigning the Applocker Policy to your devices, Applocker would start blocking all the stuff that is not in the list.
2. PowerShell and Graph
If you don’t want to go through all the hassle and manually create the Applocker rules we could also automate the process with Powershell.
It only requires two scripts; a deployment script that makes the connection to Graph and another script that contains the JSON (config) itself
Links to the Scripts (in a zip file)
- Deployment Script
- JSON File
https://call4cloud.nl/wp-content/uploads/2021/04/Windows10_Applocker.zip
The Applocker policy itself is hardened with the Lolbas Project in mind. Looking a little bit closer to the policy itself, you will notice that I added exclusions to the default allow paths. Let me explain why… When configuring your applocker XML, you need to make sure all locations that are “writable” from the user context are excluded from the allowed paths!
If you want to know more about the lolbas (lolbins) project, take a look at https://lolbas-project.github.io/
Looking at the Applocker Policy itself, you have to keep in mind that the DLL Policy is set to “Audit Only.” Please note that the DLL Policy can impact your system’s performance.
If you want to know more about how to implement Applocker, the names of 2 persons who know everything about it come to mind: Sami Laiho and Oddvar Moe.
3. Editing an Existing Applocker Policy
When you have uploaded the Applocker policy to your tenant there will come a day you need to add some stuff to it. How are we going to accomplish this?
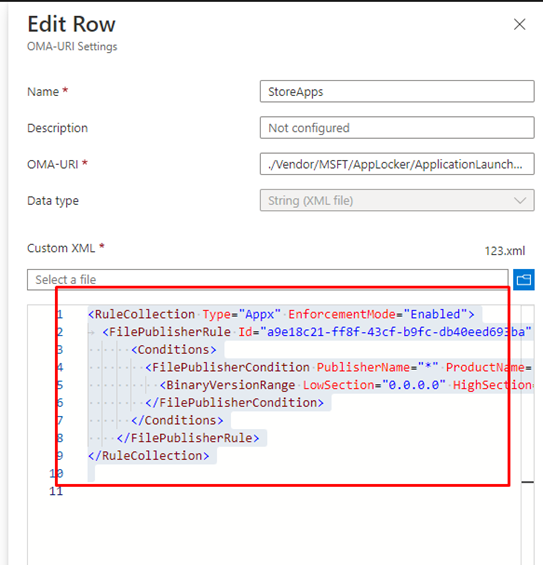
First, open Intune and open your existing Applocker policy. In this example, I am going to add an additional allowed Store App.
Select it all…. Open notepad and make sure it is in UTF-8. Copy the contents from above and make sure you save it first, so you have a proper backup
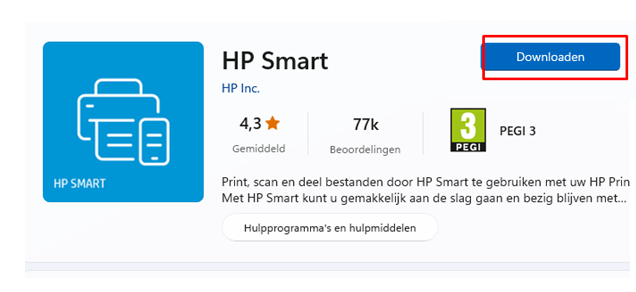
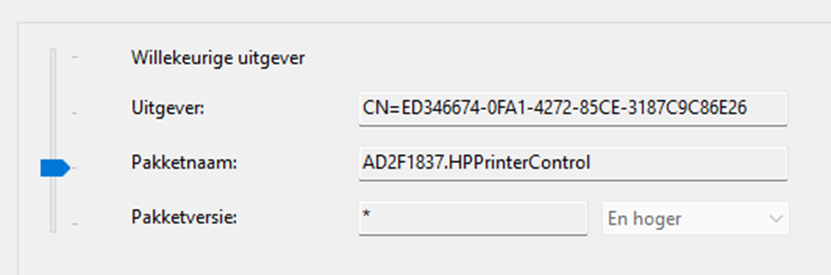
I want to make sure people could install the HP Smart App. First off, I am installing the App on my test device to make sure I could fetch the proper publisher
After installing the App, we need to open gpedit.msc and browse to the Applocker configuration, and create a new Store App rule. We are going to select the first option to select the app that we installed in the previous step.
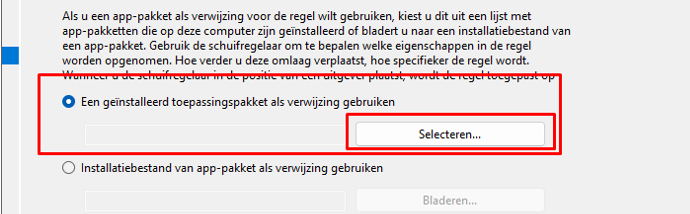

After selecting the HP Smart app, we can change some additional settings and press next to add the rule to the policy.
With this additional rule added to the policy we could export the whole Applocker policy to XML
Now we need to open that exported policy and select only the content that we need (FilePublisherRule)

And copy the content in the one you created earlier so it looks something like this and save the XML file
<RuleCollection Type="Appx" EnforcementMode="NotConfigured">
    <FilePublisherRule Id="4da47ec9-1f42-4307-9e28-b7fa740cab06" Name="Microsoft Apps" Description="" UserOrGroupSid="S-1-1-0" Action="Allow">
      <Conditions>
        <FilePublisherCondition PublisherName="CN=Microsoft Windows, O=Microsoft Corporation, L=Redmond, S=Washington, C=US" ProductName="*" BinaryName="*">
          <BinaryVersionRange LowSection="*" HighSection="*" />
        </FilePublisherCondition>
      </Conditions>
    </FilePublisherRule>
   <FilePublisherRule Id="9f93f6b2-beb9-4c37-81bf-0576732402c6" Name="Ondertekend door Microsoft Corporation" Description="" UserOrGroupSid="S-1-1-0" Action="Allow">
      <Conditions>
        <FilePublisherCondition PublisherName="CN=Microsoft Corporation, O=Microsoft Corporation, L=Redmond, S=Washington, C=US" ProductName="*" BinaryName="*">
          <BinaryVersionRange LowSection="*" HighSection="*" />
        </FilePublisherCondition>
      </Conditions>
    </FilePublisherRule>
    <FilePublisherRule Id="69395f9a-434f-47c9-8646-659cea379880" Name="AD2F1837.HPPrinterControl, van HP Inc." Description="" UserOrGroupSid="S-1-1-0" Action="Allow">
      <Conditions>
        <FilePublisherCondition PublisherName="CN=ED346674-0FA1-4272-85CE-3187C9C86E26" ProductName="AD2F1837.HPPrinterControl" BinaryName="*">
          <BinaryVersionRange LowSection="*" HighSection="*" />
        </FilePublisherCondition>
      </Conditions>
    </FilePublisherRule>
</RuleCollection>
If the XML is saved we can upload it to Intune. Don’t forget to save!
Troubleshooting Applocker
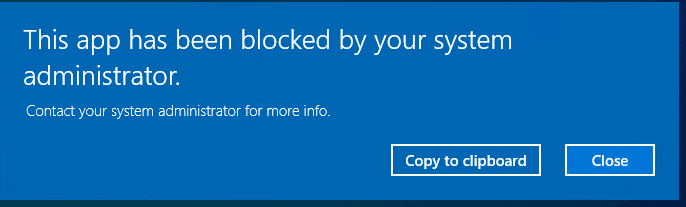
If Applocker is blocking a certain process you will be prompted with a nice error. The error would mention that your system administrator has blocked this app
Troubleshooting Applocker and knowing where to start looking is a job on its own. I dedicated this blog to it, to make sure it got the attention it needs!
Conclusion:
You really need to implement Adminless and Applocker. You can deploy Applocker manually, but why not do this for a minute. ? So you can sit back and relax.

I see a few posts showing this as the method to migrate GPO AppLocker to Intune, but is this correct? Seems like Intune AppLocker settings should be within Endpoint Security\Attack Surface Reduction\Policy Type: Application Control. Not Device Configuration Profile
I know and I have the same feeling, the official answer should come from Microsoft but from what I have heard: It’s very hard to transform the csp to a nice gui friendly interface. Because editting the csp applocker policy could break your system if not done correctly 🙂
On our “on-prem” side we integrated the policy so a specific group can’t use Edge, Chrome, etc. That is based on a SID from an on-prem group.
Member of “Geen_Internet” means all the browsers are blocked.
I tried to put in a SID of a Azure group, but that didn’t work the way i wanted it. It blocks the browsers for any user.
Any hints or ideas how to fix it?
Thats indeed a good question. I have heard that question often… Its a fact that applocker doesn’t like azure ad groups…I know its totally stupid … but what about creating a local group and adding those users to it … (nice name…. geen internet 🙂 it totally explains it purpose 🙂 )
I want to add a Rule to Allow C:\Program Files (x86) Folder by creating an allow rule.
But when i create a new rule and select the path to be allowed, it comes up as %PROGRAMFILES%\*, and when checked again after creating it points to C:\Program Files instead of C:\Program Files (x86). Any idea what is going wrong here and how to add C:\Program Files (x86)
Within the default applocker rules the Program files folder (meaning x86 and the x64 one) is allowed…. are you trying to add a specific folder or?
I have a question, please enlighten me
Your OMA-URI
./Vendor/MSFT/AppLocker/ApplicationLaunchRestrictions/StoreAppsGroup/StoreApps/Policy
OMA-URI on Microsoft’s website: https://learn.microsoft.com/en-us/windows/client-management/mdm/applocker-csp#applicationlaunchrestrictionsgrouping
./Vendor/MSFT/AppLocker/ApplicationLaunchRestrictions/{Grouping}/StoreApps/Policy
How did you come up with “StoreAppsGroup” as the “{Grouping}” value?
I am getting an error when running the .zip file provided. It has to do with “Microsoft.IdentityModel.Clients.ActiveDirectory.dll” that has been deprecated. Is there any way to update the script to use updated module
I am trying to block some applications using Applocker, so that I’m creating a rule to block the application to Everyone and other rule to allow the same application to Active Directory group. Do you know if it’s possible these options with Applocker?