So, you’re back for more fun with Windows Device Inventory, huh? Well, buckle up because this time, we’re diving into the inner details of how the Device Inventory Agent gets set up and starts harvesting data. Once I configured the Properties Catalog profile and kicked off the sync, I knew something important was happening behind the scenes. Meet the Windows Device Inventory Agent!
In this blog, I’ll take you through my journey of configuring the agent, spotting its installation, and seeing it work its magic by gathering data from your devices. Think of it as the behind-the-scenes crew quietly collecting all the important stuff while you sit back and enjoy the show.
Ready to see how the Device Inventory Agent works in the wild? Let’s jump in and watch this agent spring into action, one harvested.txt file at a time.
The Device Inventory Payload
As mentioned in the previous Device Inventory blog, you need to configure the properties catalog and define which entities you want to harvest.

Once I configured the Properties Catalog profile and assigned it to my test devices, I ensured I had the SyncML tool and Procmon in place. Once I initialized the sync with Intune, I noticed the Device Inventory payload transfer kicking in.

This CSP will ensure that a new Enterprise Desktop App will get installed. This is the new agent I was talking about previously, the Device Inventory Agent!
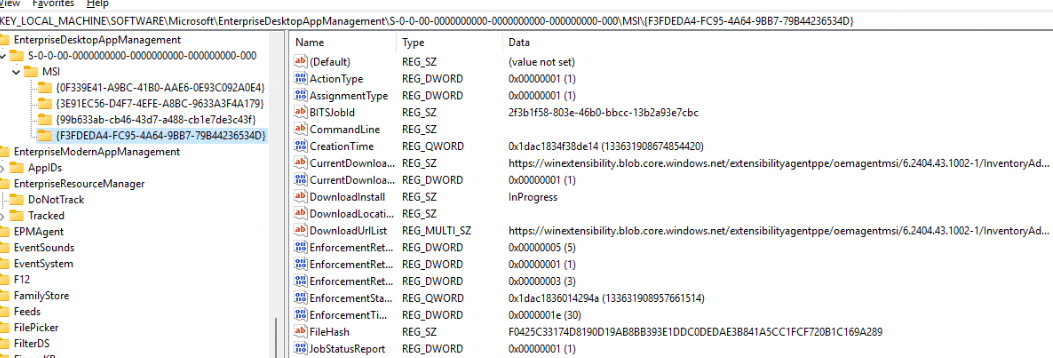
This agent will be installed in the program files. Inside the program files folder, it will install itself in the Microsoft Device Inventory Agent folder.
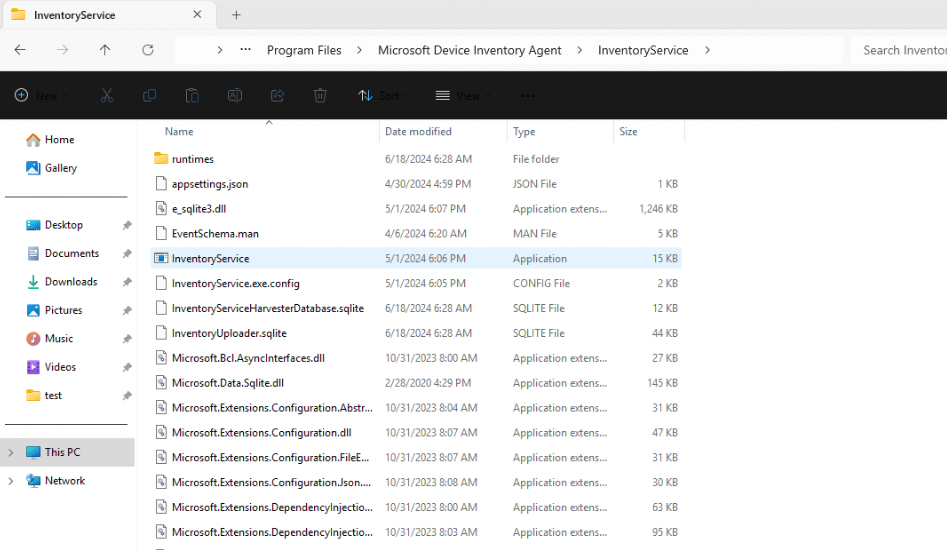
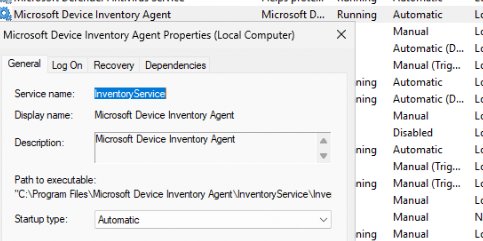
As shown above, a new folder, Inventoryservice, will be created inside that folder. I guess it’s pretty evident that with such a name, we also get a new service on the device. As shown below, when the device inventory agent gets installed, a new service, the InventoryService, will also be deployed to our device.
In addition to the folder and the service, we can also spot the arrival of this device inventory agent by looking at the corresponding device inventory registry key. As shown below, this registry key holds the harvesterpolicy information.

But what if this ain’t working? What if somehow the Inventory Service is not started? What if the InventoryAdapter folder is missing? What if the Properties Catalog policy report is showing you the weird 2147749902 error? If that’s the case, you need to read this blog first.
With the Device Inventory agent and Inventory Service installed, its configuration still needs to be retrieved, right?
Device Inventory Settings
The moment the agent was installed, the device also received a new kind of declared configuration document.
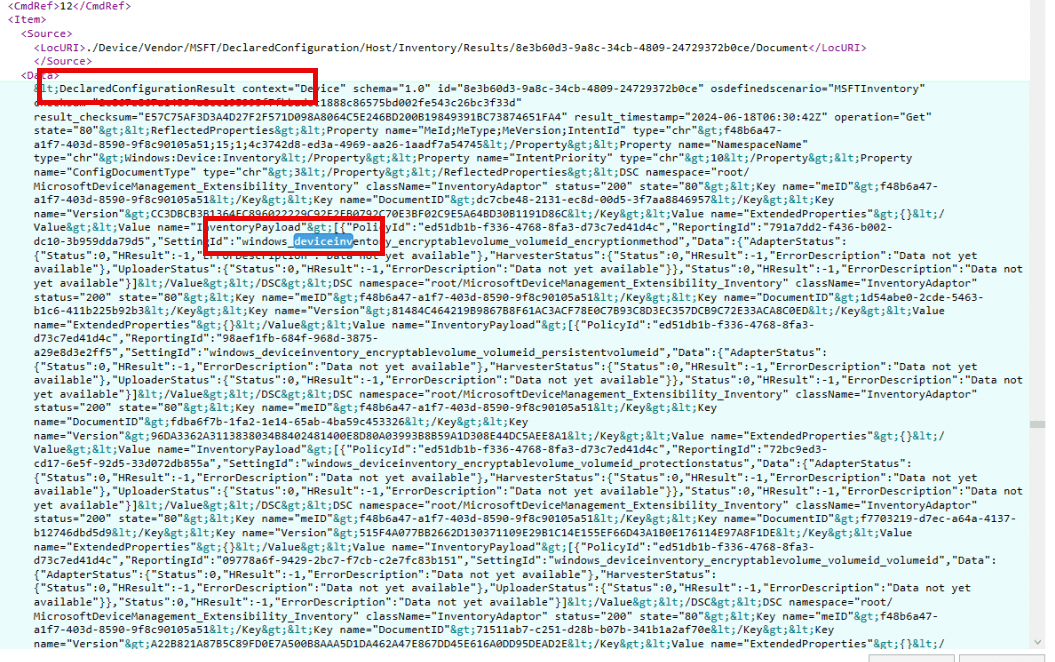
This declared configuration document contains the properties catalog settings we configured in Intune. These properties will be used to query the proper WMI settings on the device. With this CSP arriving on the device it’s obvious that this declared configuration will be saved in the corresponding DeclaredConfiguration registry key.
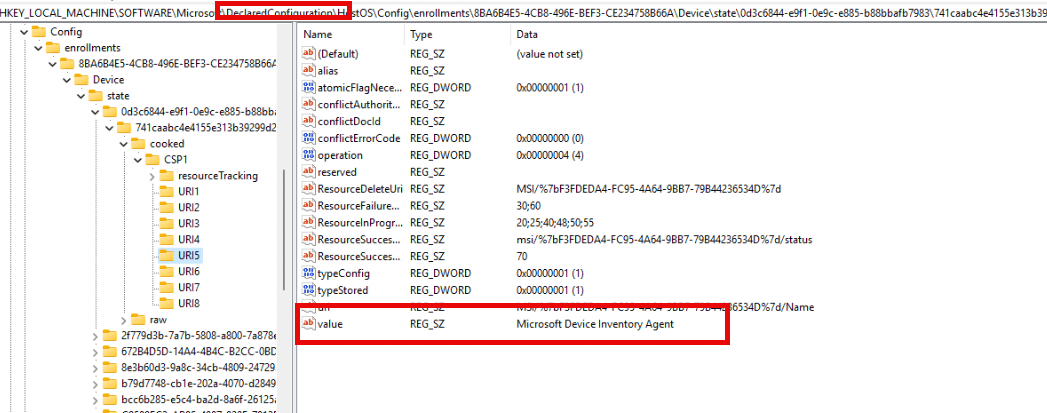
As shown above, we have a declared configuration document mentioning the Microsoft device inventory agent. But wait… declared configuration documents? That doesn’t sound like the regular Intune Policy? Is that something new?
Nope… It’s not! Let me explain a bit more.
Declared Configuration Documents
Endpoint Privilege Management (EPM) also uses declared configuration documents for its configuration. The same now goes for the Device Inventory. These Declared Documents rely on the Windows Declared Configuration service (dcsvc) to retrieve/refresh their setting.
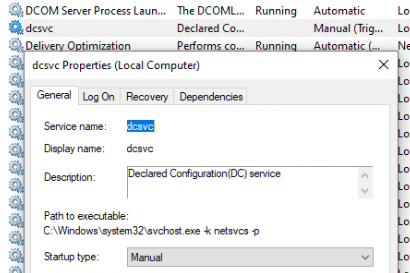
This Declared Configuration service itself relies on the MMP-C/Linked/Dual Enrollment/Declared Configuration Enrollment on your device. This new magical next gen infrastructure was implemented to improve the speed and performance of policy delivery.
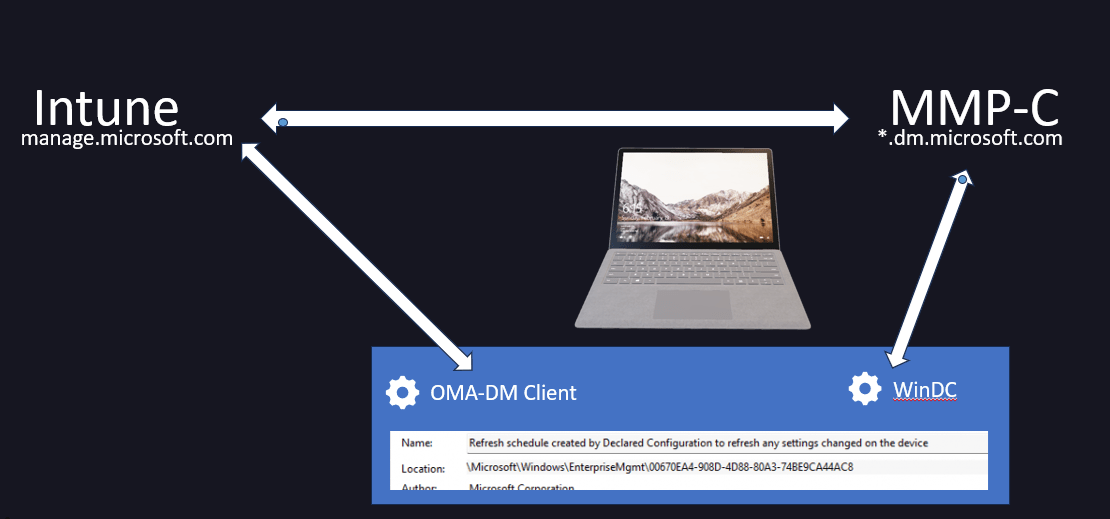
The Device Inventory feature installs a new agent on the device, which fetches its configuration by relying on Linked/Dual Enrollment that is tight to the MMP-C infrastructure.
Cool!! Let’s look at how the Device Inventory agent gathers properties on the device and uploads this information to the Intune service.
Unfolding the Inventory Agent
I opened the DLL files corresponding to the new Device Inventory agent and compared them with my Procmon and Fiddler traces. Here’s what I discovered and how I believe the Device Inventory agent operates.
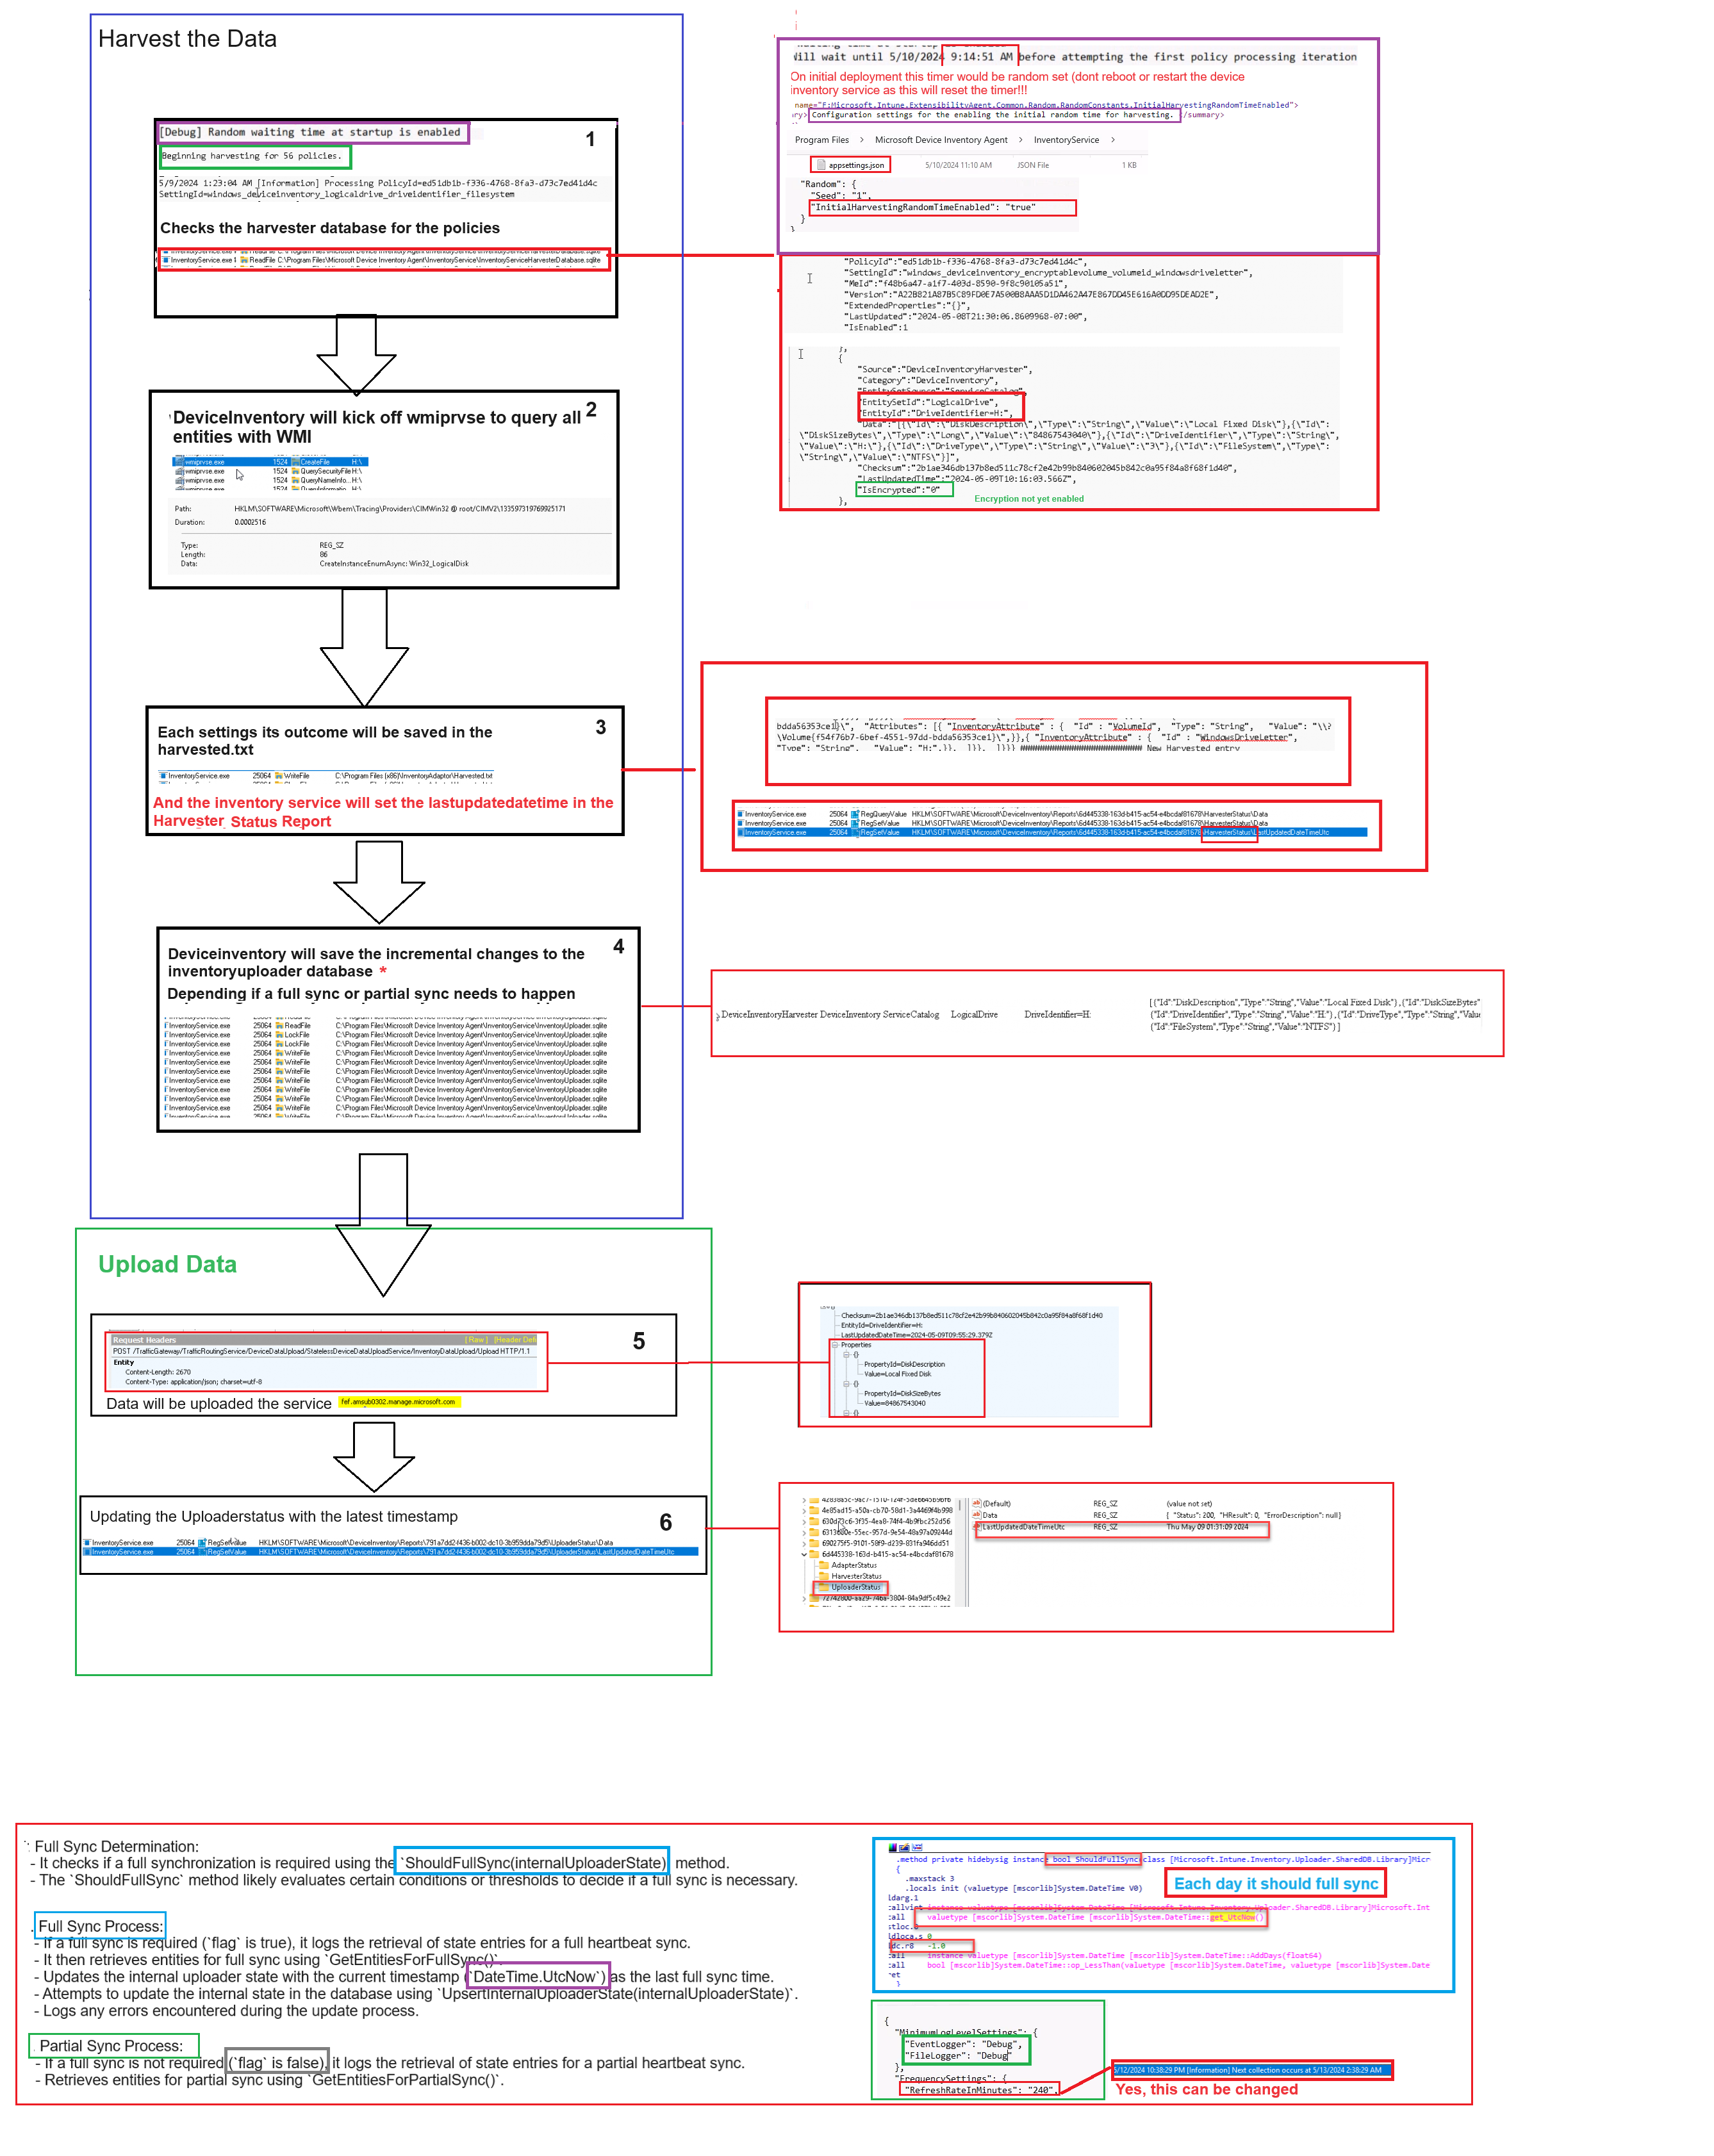
Initial Harvest of the Data:
When the device inventory agent has been installed, the device waits until a specified time before attempting the first harvesting. This initial wait time is randomly set to avoid conflicts and ensure a smooth startup.

The InventoryService checks the Harvester SQL Lite database for the specified policies, including policies like logical drive identifier and file system. The Harvester processes these policies.
Policy Processing:
The InventoryService reads from the harvester database to determine which policies need to be processed based on their IDs and timestamps.
The process includes setting specific identifiers for each policy, ensuring they are processed correctly. The results are documented in harvested.txt.
Data Collection with WMI:
The Device Inventory agent collects data using Windows Management Instrumentation (WMI), which queries various device properties, such as TPM, CPU, and logical drive values.
For example, it uses queries such as SELECT * FROM Win32_LogicalDisk WHERE DriveType = 3 to get information about local fixed disks. This includes details like disk description, size, and file system type.

All collected data is logged in harvested.txt for further reference.
Event Logging:
The InventoryService logs each step in the harvested status report, including the start and end times of each data collection process and any errors encountered.
Essential information such as encryption status, device identifiers, and collected data properties are logged for troubleshooting and verification. The harvested.txt file serves as a detailed log of the harvesting process.

Data Upload:
Once data collection is complete, the Device Inventory agent prepares the data for upload. This involves formatting the data into a JSON structure.
The collected data is uploaded to the Data Platform service via a secure HTTP connection. This includes properties like disk description, size, and other relevant details.

The upload process is logged on the device. The uploader status is updated with the latest timestamp, ensuring its completion. The harvested.txt file is updated to reflect the upload status.
Update Uploader Status:
The uploader status is updated with the latest timestamp and logs the completion of the upload process.

This step ensures that the data is accurately recorded and available for query in the Intune service. With the data being uploaded and ready for querying we can spot it in the Resource Explorer.

Full and Partial Sync
Full Sync:
The ShouldFullSync method determines whether a full synchronization is necessary. It evaluates specific conditions or thresholds to determine whether a full sync is necessary.
During a full sync, all device properties are collected and uploaded. The internal uploader state is updated with the current timestamp as the last full sync time.
The process logs the retrieval of state entries and updates the internal state in the database using UpsertInternalUploaderState(internalUploaderState). Any errors encountered are logged for troubleshooting. The harvested.txt file is updated with full sync details.
Partial Sync:
If a full sync is not required, a partial sync is performed. This involves retrieving only the state entries that have changed since the last sync.
The partial sync process logs the state entries and updates the internal uploader state accordingly.
It uses GetEntitiesForPartialSync() method to retrieve the necessary entries, ensuring that only the relevant updates are processed and uploaded. The harvested.txt file documents these partial sync activities.
The Device Inventory Agent Overview
Hopefully, you are still enjoying my MSPaint flows, as I do…
Conclusion
And there you have it, the Device Inventory Agent in all its behind-the-scenes glory. From installation to harvesting data and syncing with Intune, it’s the quiet hero keeping your inventory up-to-date. With declared configurations and the MMP-C infrastructure, it’s all about efficiency and precision.


Very interesting!! Just a question…I created the cfg profile and deployed it to a machine subset, showing a succeeded state.
When I go to Resource Explorer to evaluate what has been collected, as for statement “provide me always clear messages”, the console dumps the “Something went wrong” information, with no additional details about what EXACTLY went wrong 🙁
Do you have an idea about this? I already assigned licenses to the admin user.
Thanks a lot!
it could take up to 24 hours before the initial harvest is done.. 🙂 and with it the data being uploaded to the data platform and accesible in resource exploirer
on most of the devices Microsoft Device Inventory Agent is not installing.
What can be a reason?
can you elaborate more on not installing? is the device inventory folder itself not created at all or ?
I created and deployed this Microsoft Device Inventory profile on device group however I am getting only error in reports on Intune with the error code “2147749902”, How shall I fix this?
Thank you so much, very interesting, I’m waiting for the service to be created after activate the policy, nice! extremly detailed write-up
if the service fails to be created on the device, please let me know.. i am writing the blog with the fix in it
Morning Rudy, just posting in case you observed that ?
Properties device configuration created and deployed w/o issues –
Device Inventory application installed w/o issue – service running – log created as expected – harvest DB not empty – log files confirms it but …. Intune says “No Data found” , been more than a week that the configuration is deployed
HarvesterLog.log throws those error messages:
3/17/2025 10:09:38 AM [Information] Sending web request to location service at https://agents.manage.microsoft.com/RestUserAuthLocationService/RestUserAuthLocationService/Certificate/ServiceAddresses.
3/17/2025 10:09:38 AM [Error] WebException getting endpoint From location service. WebException status ProtocolError message The remote server returned an error: (400) Bad Request. at System.Net.HttpWebRequest.GetResponse()
at Microsoft.Intune.Inventory.Uploader.Client.Library.Interface.InventoryUploaderNetworkHelper.GetEndpointFromLocationService()
3/17/2025 10:09:38 AM [Error] Failed to retrieve location URI
….
3/17/2025 10:09:38 AM [Error] Exception during upload data. Message Null Upload Service Uri.
…
3/17/2025 10:09:38 AM [Error] Null or error response for request baa85fbb-0335-4b88-baee-5d2952657b2d. Marking state entries as failed.
…
There is a possibility that my remote access solution (CASB and not vpn) corrupts the data exchange to agents.manage.microsoft.com (will investigate) but thought i would ask ? 🙂
Thanks.
Mmmm yeah so it seems… as the inventory agent should be ablet to access agents.manage.microsoft.com and it seems something is breaking that communication… would love to hear more (and of course try to rule out the remote access solutiob )
I was able to get the Device Inventory Agent installed, but only on devices not protected with App control for Business. As soon as App control for business is enabled, it stop working and also any new device which is already protected with app control is never able to successfully install the agent. Is this expected behaviour? Could I be doing any additional steps?
Thank you!
It depends on how you configured the app control for business rules.. as i pretty much assume you need to add the device inventory agent hash/cert to your allowlist?