
Last Updated on July 27, 2024 by rudyooms
This blog is the seventh part of the Endpoint Security Series, I’ll explain how to deploy your Windows Defender firewall baseline policy rules into Intune.
1. Some Background Information
Configuring Windows Defender Firewall rules on your Windows 10 or 11 device shouldn’t be forgotten. You really don’t want to have unauthorized network traffic coming from and to your Windows 10 Devices.
The Windows Firewall is enabled by default, but it still needs some additional configuration when you want to add an additional layer to your defense. You could add some allow or deny rules to your existing configuration.
As a good example: Do you know which ports are most used to establish a reverse PowerShell? TCP port 444 is one of the many examples.
An introduction to Reverse Shells – JCore Blog
So when we don’t need this port for outbound traffic, why not block it?
2. Deploying Rules with the Firewall Migration Tool
When I first wrote this blog (2020-07), the Microsoft defender firewall rule migration tool was released, the first time I tested it, it didn’t work as expected. I couldn’t edit the imported rules but now, after a few months, it works great!
In most companies, the Defender Firewall rules are centrally managed and deployed with Group policies. So it’s great there is a tool now to migrate them to Intune! So download the tool and start migrating them! I will show you some stuff you need to beware off.
Before I could do anything, I needed to remove the __PSLOCKDownPolicy to 1.…Otherwise, you are stuck to the constrained language mode. Don’t forget to launch PowerShell as an Admin

After installing all of the required modules it prompted me for my Microsoft credentials.
After entering the correct Microsoft Tenant Admin credentials the Firewall rules were exported and imported successfully in Intune.
3. Deploy rules with a Powershell Script
When you don’t want to use the migration tool to migrate your firewall rules to Intune you could also use a PowerShell script! You could use Netsh to add some Firewall rules!
Netsh.exe advfirewall firewall add rule name="Block Notepad.exe netconns" program="%systemroot%\system32\notepad.exe" protocol=tcp dir=out enable=yes action=block profile=any
Netsh.exe advfirewall firewall add rule name="Block regsvr32.exe netconns" program="%systemroot%\system32\regsvr32.exe" protocol=tcp dir=out enable=yes action=block profile=any
Netsh.exe advfirewall firewall add rule name="Block calc.exe netconns" program="%systemroot%\system32\calc.exe" protocol=tcp dir=out enable=yes action=block profile=any
Netsh.exe advfirewall firewall add rule name="Block mshta.exe netconns" program="%systemroot%\system32\mshta.exe" protocol=tcp dir=out enable=yes action=block profile=any
Netsh.exe advfirewall firewall add rule name="Block wscript.exe netconns" program="%systemroot%\system32\wscript.exe" protocol=tcp dir=out enable=yes action=block profile=any
Netsh.exe advfirewall firewall add rule name="Block cscript.exe netconns" program="%systemroot%\system32\cscript.exe" protocol=tcp dir=out enable=yes action=block profile=any
Netsh.exe advfirewall firewall add rule name="Block runscripthelper.exe netconns" program="%systemroot%\system32\runscripthelper.exe" protocol=tcp dir=out enable=yes action=block profile=any
But, wouldn’t it be nicer to configure the firewall rules within the Endpoint Security section instead of deploying the firewall rules to your devices with a PowerShell script? Because altering an existing firewall rule through PowerShell is not ideal.
4. Manually Deploying rules with Intune
Let’s find out how to create a Firewall rule on your own, by opening Intune and opening Endpoint Security and clicking On Firewall, and starting creating a policy.

As you can see, you can define your own additional firewall rules.
Looking at the picture above, guess what rules are we going to implement? To make sure we have all the required firewall rules we need, let’s look back to my blog about Applocker where I mentioned the Lolbas project.
https://lolbas-project.github.io/
It’s a lot of work if you choose to configure all these Lolbins manually. It takes about 1 or 2 minutes to create just one firewall rule. So, it’s going to take a lot of time to block all the Lolbins.

When you are adding Firewall Rules in Intune you could run into an issue when you need to add a User Based firewall rule. As those rules are deployed in the System Context you are up for a challenge because you can’t use %username%
To make sure those rules are added you need to use PowerShell to find all the user folders on the device and add the exclusion for each user
$users = Get-ChildItem (Join-Path -Path $env:SystemDrive -ChildPath 'Users') -Exclude 'Public', 'ADMINI~*'
if ($null -ne $users) {
    foreach ($user in $users) {
        $progPath = Join-Path -Path $user.FullName -ChildPath "AppData\Local\Microsoft\Teams\Current\Teams.exe"
        if (Test-Path $progPath) {
            if (-not (Get-NetFirewallApplicationFilter -Program $progPath -ErrorAction SilentlyContinue)) {
                $ruleName = "Teams.exe for user $($user.Name)"
                "UDP", "TCP" | ForEach-Object { New-NetFirewallRule -DisplayName $ruleName -Direction Inbound -Profile Domain -Program $progPath -Action Allow -Protocol $_ }
                Clear-Variable ruleName
            }
        }
        Clear-Variable progPath
    }
}
Sample script – Microsoft Teams firewall PowerShell script – Microsoft Teams | Microsoft Docs
5. Automatically Deploying rules with Intune
When you are not in the position to use the Migration Tool you could just use this PowerShell script below to let the automation begin!
https://call4cloud.nl/wp-content/uploads/2020/07/Windows10_firewall_rules.txt
Open a PowerShell Script and Copy-Paste the whole text content and watch it go.
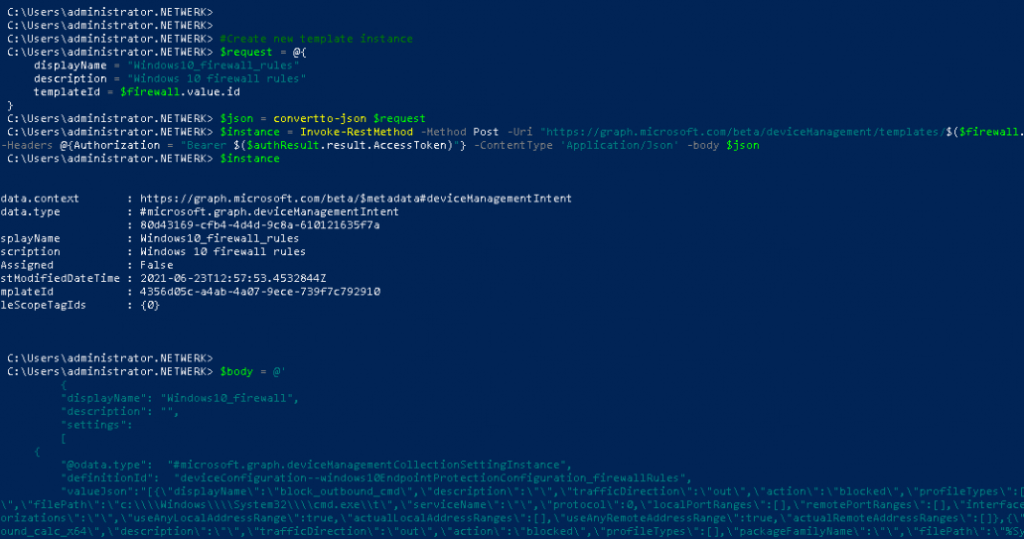
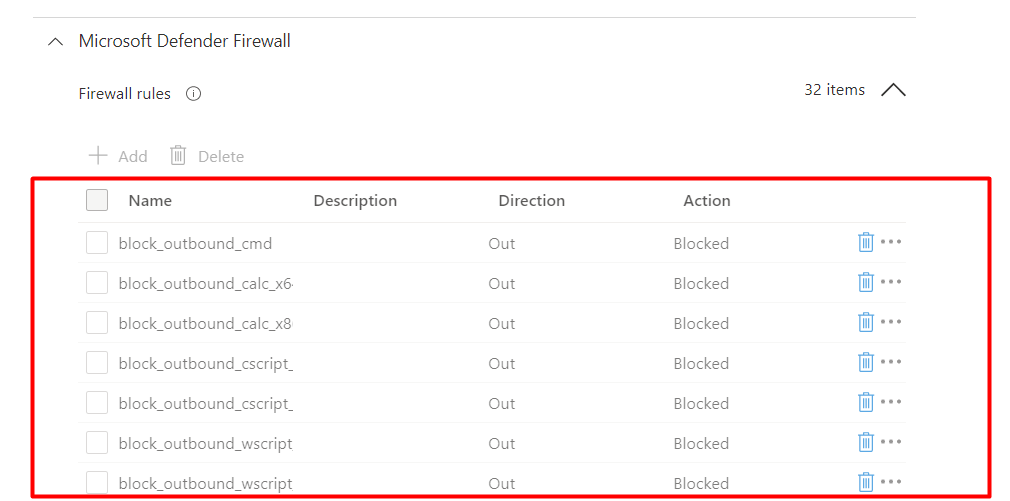
And within a few seconds, the Endpoint Security Windows Defender Firewall Rules policy is created with a lot of rules in it.
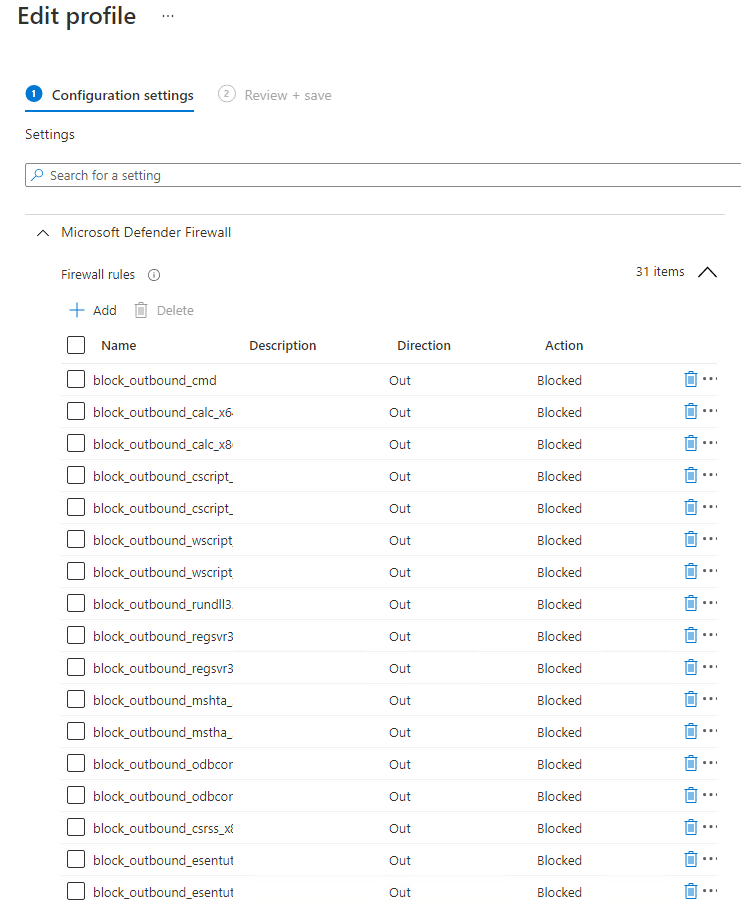
6. Don’t forget to lock it down
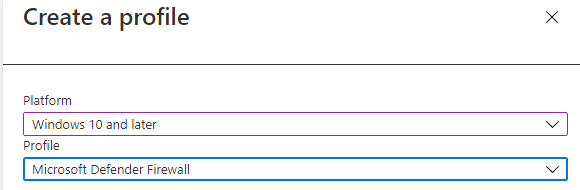
Please note that ONLY creating Firewall Rules isn’t the best practice you also need to be 100% sure the Firewall is up and running. Secondly, you really don’t want the firewall to easily be disabled by end-users!. To do so, we need to create an additional Endpoint Security Firewall policy.
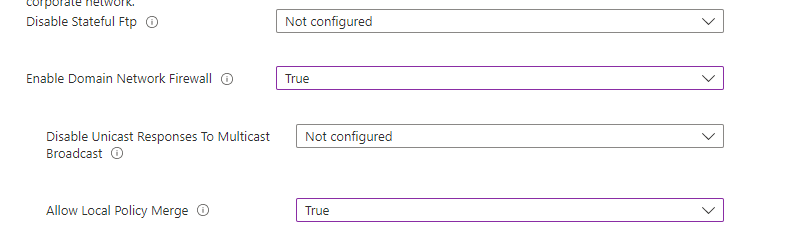
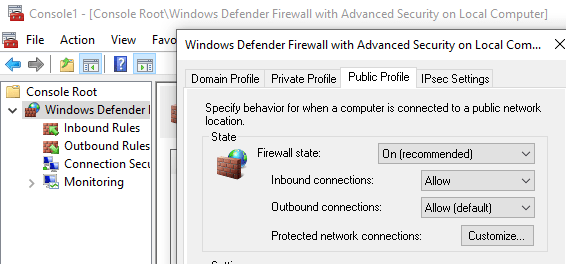
And make sure you turn on the Microsoft Defender Firewall for Public/Private and the domain network. You could also configure the “Allow policy merge” but by default this is configured to yes
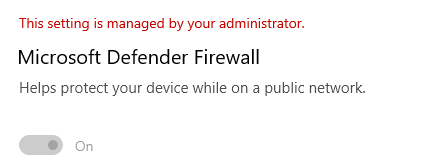
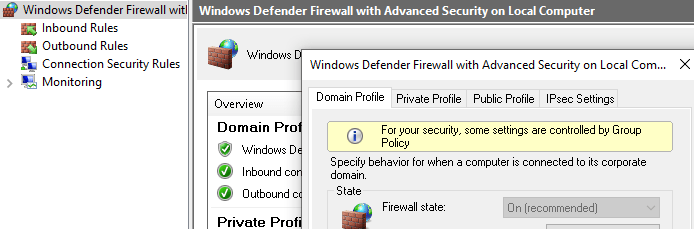
When the policy is deployed you can try to change the Firewall Settings on the Security Settings Page. It’s greyed out!
But what about the old school settings? As shown below… (Opened the MMC as admin) I could still disable it!
But even with the proper policies it still isn’t enforced? Requesting a Diagnostic report also showed me the correct setting.

I was really expecting something like this?
Looking back at the Endpoint Security Defender Firewall policy… I was hoping that configuring this policy would make sure no one could change the Firewall Settings.
So for now, until I find the reason why it doesn’t lock it, I created an additional PowerShell script to make sure it was on and enforced!
new-item -Path 'HKLM:\SOFTWARE\Policies\Microsoft' -name "WindowsFirewall"
new-item -Path 'HKLM:\SOFTWARE\Policies\Microsoft\WindowsFirewall' -name "DomainProfile"
new-item -Path 'HKLM:\SOFTWARE\Policies\Microsoft\WindowsFirewall' -name "PublicProfile"
new-item -Path 'HKLM:\SOFTWARE\Policies\Microsoft\WindowsFirewall' -name "StandardProfile"
Set-ItemProperty -Path 'HKLM:\SOFTWARE\Policies\Microsoft\WindowsFirewall\DomainProfile' -name "EnableFirewall" -Value 1
Set-ItemProperty -Path 'HKLM:\SOFTWARE\Policies\Microsoft\WindowsFirewall\PublicProfile' -name "EnableFirewall" -Value 1
Set-ItemProperty -Path
'HKLM:\SOFTWARE\Policies\Microsoft\WindowsFirewall\StandardProfile' -name "EnableFirewall" -Value 1
You could add this to your Baseline Hardening script as I did in this blog in part 6 about the forgotten fruits of securing your Windows endpoints!
7. Removing the Firewall Rules
If you want to remove the Endpoint Security Firewall Rules, you are lucky because the tattooing issue with some Endpoint Security Configuration profiles is gone. Of course, you will need to make sure you are running up to date Windows build.
Some time ago I wrote a blog about this tattooing issue. Feel free to check out to understand the Tattoo issue!
Let’s see what happens when we remove the profile or remove the assignments!

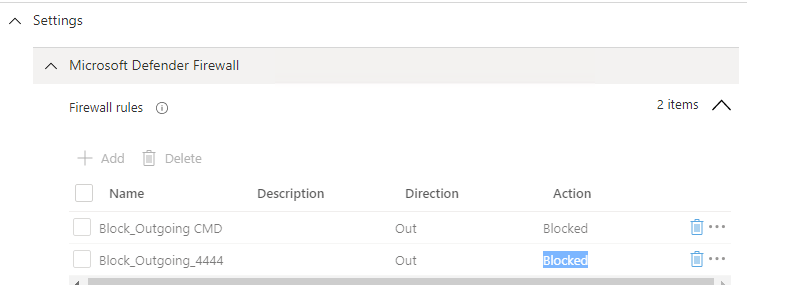
As shown above, the Firewall rules are also removed from the endpoint! When you want to be sure that the corresponding settings on the device are removed when a policy is removed you will need the SyncML viewer from Oliver
Let’s take a look at the SyncML viewer when we first ADD the assignment and press the sync button in the Company portal app!

As shown above, the rules are “added”, but what happens when you remove the assignment?
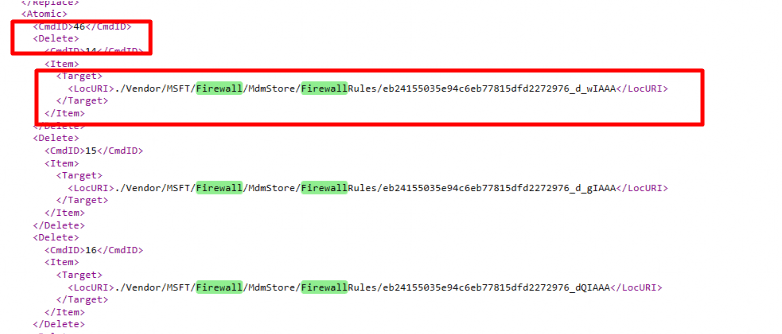
As shown above, when removing the assignment or removing the policy will give a “*delete” command and the Firewall rules are removed!
*Delete: Removes a node from the DM tree, and the entire subtree beneath that node if one exists
8. Results
You always need to be 100% certain when you configure “something” it’s working and applied! When we need to check if the firewall rules are deployed we can use 4 different methods.
1. Windows Defender Firewall MMC
When looking at the advanced firewall rules, you’ll notice it seems that the firewall rules you configured are missing?. It’s weird… but look at the monitoring/firewall section, and you will notice the rules arrived on the devices

2. Registry
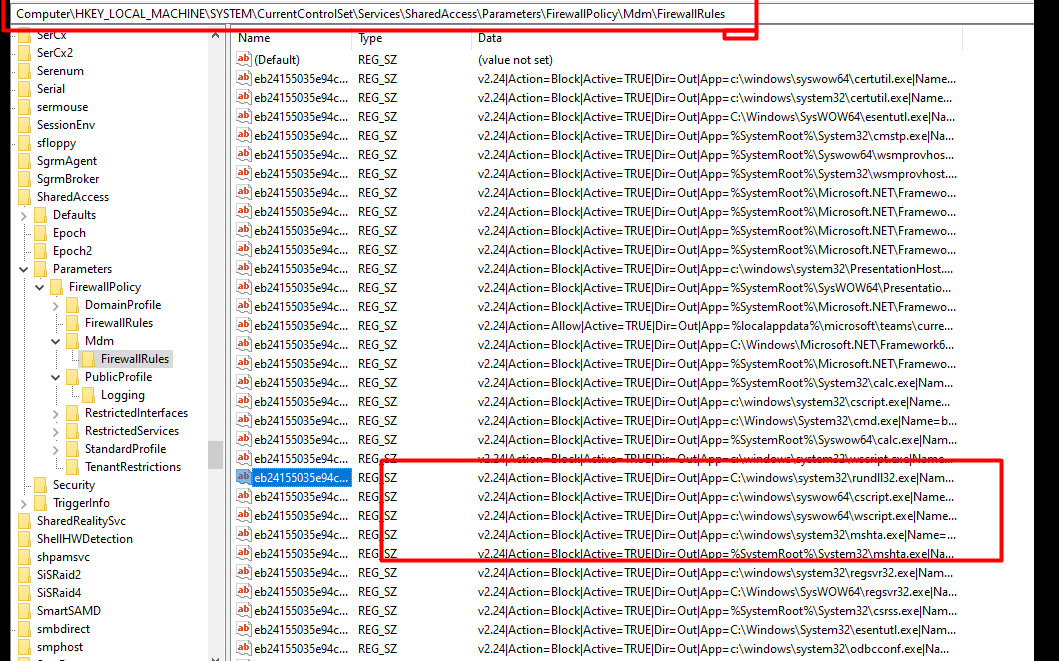
When you want to know if the Microsoft Windows Firewall rules arrived at your device you could also open the registry to check if the firewall rules are deployed!
Computer\HKEY_LOCAL_MACHINE\SYSTEM\CurrentControlSet\Services\SharedAccess\Parameters\FirewallPolicy\Mdm\FirewallRules
3. Intune Reporting
But looking at the device itself by opening Regedit or MMC to determine if the firewall rules arrived is weird! because Intune also has the reporting built in, why not use it?
When you want to know if the Firewall is enabled on all the devices, just open Intune and generate the Firewall Report

4.PowerShell
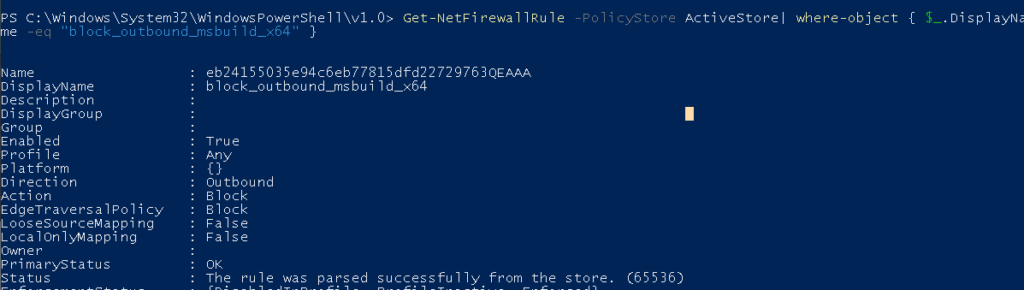
I guess we always could use PowerShell to find out if the Firewall rules are deployed and active. You could do so by opening a new PowerShell session and entering this command: Get-NetFirewallRule -PolicyStore ActiveStore | where-object { $_.DisplayName -eq “FireWallRuleName” }
Please Note: change the “firewallrulename” to a rule you want to check!
9. Logging the Rules
Now we are pretty sure the Windows Firewall is enabled and all the Firewall rules are configured let’s test it… Because reporting is one, testing it is two!
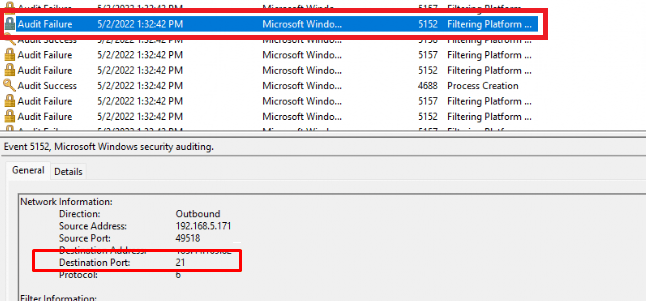
To test it I just simply opened a cmd and tried to telnet to an FTP server on the well-known port 21.

Connection failed… just as I wanted it to fail! So your rules are doing their job! But I am not done yet. When you have read my blog about the forgotten fruits of securing your Endpoint you will probably have noticed these 2 lines mentioning “Auditpol” in the hardening script.
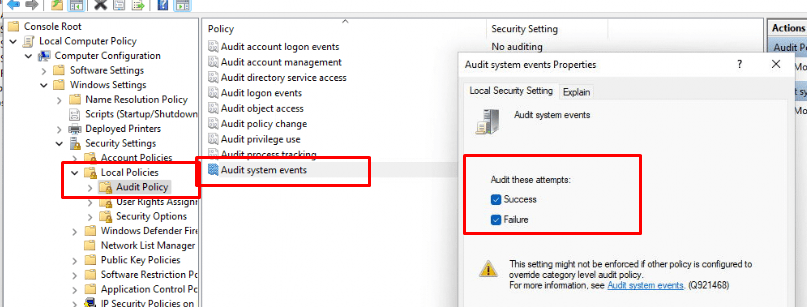
Auditpol /set /category:”System” /SubCategory:”Filtering Platform Packet Drop” /success:enable /failure:enable Auditpol /set /category:”System” /SubCategory:”Filtering Platform Connection” /success:enable /failure:enable
With these 2 commands above we are making sure we have enabled the possibility to Audit Succes and Failure system events!
As shown below, when auditing is enabled, blocked event 5152 connections will be logged!
Conclusion:
Blocking specific programs or ports for outbound connections is a great idea but you have to be careful. Because blocking a program’s outbound connection can break some stuff. It’s also best practice to block PowerShell outbound. Beware the rules are for all users! When you block PowerShell, it’ll be blocked for everyone!
Beware, Windows Defender Firewall is just another security barrier, it doesn’t mean it will stop all intrusions!

If you want to read more here is the link to the other Endpoint Security blogs
https://call4cloud.nl/category/endpoint-security-series/
Hi, great blogpost, would you be willing to share all the firewall rules you put in place please?
Normally this would be the most process I will block
https://call4cloud.nl/wp-content/uploads/2020/07/Windows10_firewall_rules.txt
Hi Rudy,
Thanks for this article. Just a quick question, is there a way to enable firewall logging using CSP ?
That should be a nice addition indeed… WHhen looking at the firewall csp
https://docs.microsoft.com/en-us/windows/client-management/mdm/firewall-csp
I couldn’t find
Registry Path SOFTWARE\Policies\Microsoft\WindowsFirewall\DomainProfile\Logging
Value Name LogDroppedPackets
Maybe ingestion the admx would work?.. but I guess looking at the sofware\policies key.. I guess that isn’t going to work.. So pro active remediations it is
Is this still the best way to add Firewall Rules in Endpoint Security in 2022?
In the script, there’s the comment “#assign to all devices”. Does this sign to all devices, rather than doing the device assignment through Endpoint Security > Firewall > Microsoft Defender Firewall Rules or does it make the configuration available to all devices?
Hi,
If you want to automate it, graph is still the way to go. When running the script it will change the assignment to all devices.
Can you tell me how you got the syntax to build the json for the powershell script in section 5? I have a number of rules to build out but I am not sure how to get all of the possible settings.
Nice post, applying a FW rule works well but the removing of a rule does not seem to work as specified.
I simply unassigned the policy (config profile) synched the machine, but the rule remains, any ideas?