
Last Updated on July 26, 2024 by rudyooms
This blog will show you how you could make sure you can still pre-provision your devices with Autopilot even when those fancy new devices have Intel Tiger lake chipsets (11th gen).
PLEASE NOTE: This fix only works for the Intel Tiger lake Chipset, not for AMD!. When there is a fix for AMD I certainly will post a new blog!
If you didn’t read my TPM attestation blogs, please read them first as they could give you a good understanding of what is happening.
I hope everybody has been busy reading my blog series about the TPM attestation issues you could encounter when deploying Autopilot White-Glove aka Windows Autopilot for pre-provisioned deployment
1. The Fix
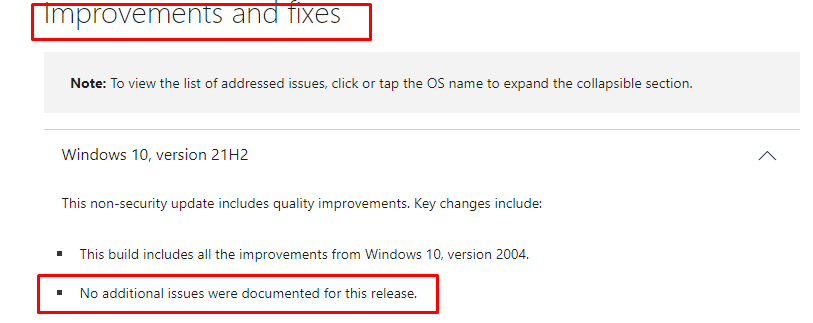
Like I showed in the blog I mentioned earlier in this blog, the solution then was to enrol your device into the Insider previews to start updating your device to make sure you got the *KB5007253 (Windows 10) or the *KB5007262 (Windows11) installed in the OOBE screen to start enrolling your device!
*KB5007253 Aka: 2021-11 Cumulative Update Preview.
I still find it a little bit strange, that the huge TPM fix isn’t documented…
But did you know that you could also just download this required update manually? Looking at the picture below, you can also download it for Windows 10 2004/20H2/21H1…. Sooooo??? Looking at it, you could expect that 20h2 would also work? (not sure.. need to test it)
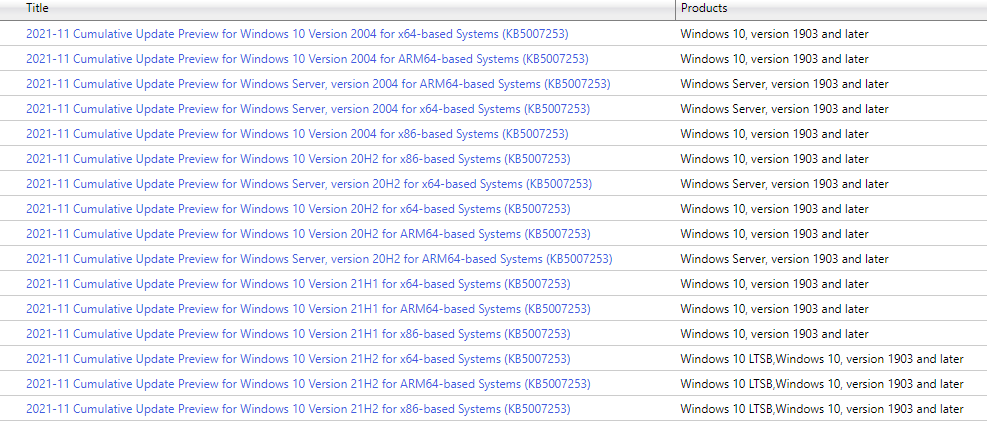
If you want to download it, here is the download link you will need.
But applying this fix, was of course fun to test with. But in a production environment, you don’t want to run insider builds on your devices. Also implementing this fix manually on each device is going to take a lot of your valuable time, so why not slipstream that KB?
2. How to Fix it for Windows 10
There are many options available out there to fix it all! But let’s go back to the good old days and just slipstream that KB!
2.1 Prerequisites
First, let’s plug in the USB stick (or image, depending on what you want to do…) we are using to deploy Windows 10 to our devices.
We are going to use Deployment Image Servicing and Management (DISM), if you are not familiar with DISM, I would recommend just downloading the GUI DISM tool. This will be a lot easier for now…
Download DISM GUI free – latest version (softfamous.com) Downloading .. DISM GUI – Soft Famous
After we have downloaded the Tool we also need to download the required KB5007253 I mentioned earlier. Download link again Microsoft Update Catalog

Because I was already having a nice up-to-date 21H2 Windows 10 USB stick, I will stick with the update I showed you above.
Now we have all the prerequisites in place, we need to create 2 additional folders to keep everything tight and clean. In my example, I created two folders.
First one : 21H2Updates (in this folder I will put the KB5007253 file I downloaded earlier) 
Second one : Mounted-Wim (as we need to have a folder to “extract” the *install.wim file in to)
*”The install. wim file (Windows Image File) is a compressed file which contains a set of many files and associated file system metadata and is included in any Windows installation Media under the “sources” folder (sources\install. wim)”

2.2 The DISM tool
Now we need to open the DISM tool we downloaded earlier and select the WIM file from the USB stick to start slipstreaming
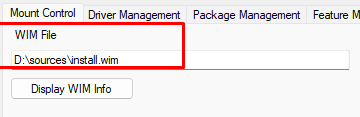
Please note: If you don’t see the install.wim file in that folder, you will need to convert the install.esd to install.wim first.
Convert an ESD File to a WIM File for Driver Updates in Your Windows… (intel.com)
If you have selected the proper WIM file, we need to make sure we are selecting the right Windows 10 version to inject the KB into. We can simply do this by clicking on “Display WIM info”
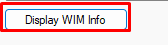
In the example below, I want to target the Windows 10 pro build, so I need to select index 6
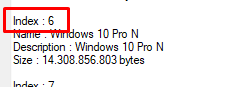
So please make sure that you select the right index before we mount the WIM file. To do so change the Index setting to match the Index you got from the WIM info

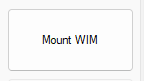
Now we are sure we have selected the WIM file we want to adjust, we also need to select the temporary wim folder. So please select the mounted-wim folder I showed you in the first steps

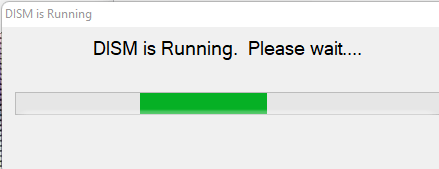
Now click on “mount wim” and get yourself a cup of coffee

After a while, you can switch the tab to “Package Management” to start the injection
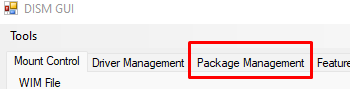
To do so, we need to select the KB folder we have created in the first steps (duhhhh)

Now click on packages…. And again you will need to have some patience

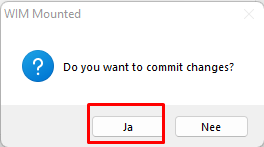
After the package is successfully added, the only thing left to do is, to click on “Dismount WIM”
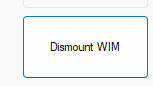
And make sure we are committing the changes
3. How to fix it for Windows 11
We all know that it should be fixed with Windows 10 21H2, and you should expect that it was fixed with Windows 11. But it wasn’t either for 21H2 or Windows 11. So go ahead and download this update (KB5007262) when you are using Windows 11.

And with this update downloaded you could exactly do the same as you did with the latest Windows 10 21H2 build. Just like with Windows 10, please make sure you have downloaded the latest Windows 11 Build to slipstream this update into !
4. The Results
Now, let’s fire up your Intel Tiger lake device and start installing the device. After the default installation, we are going to first make sure we have the right build. So press shift + f10 to get a nice cmd and type: winver
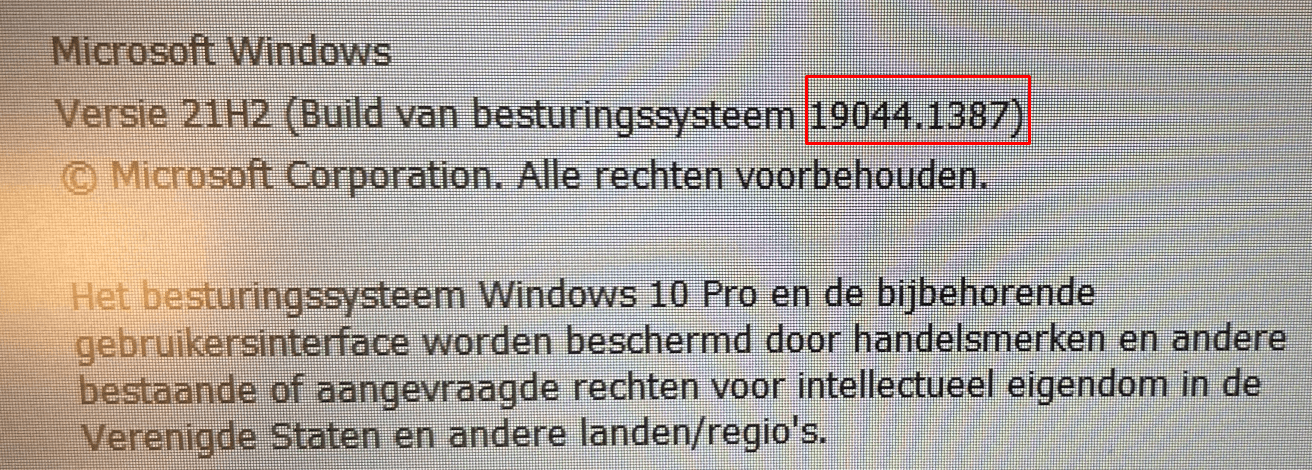
As shown above, we get even a little bit newer build than I was expecting! Now we have 19044.1387 build!
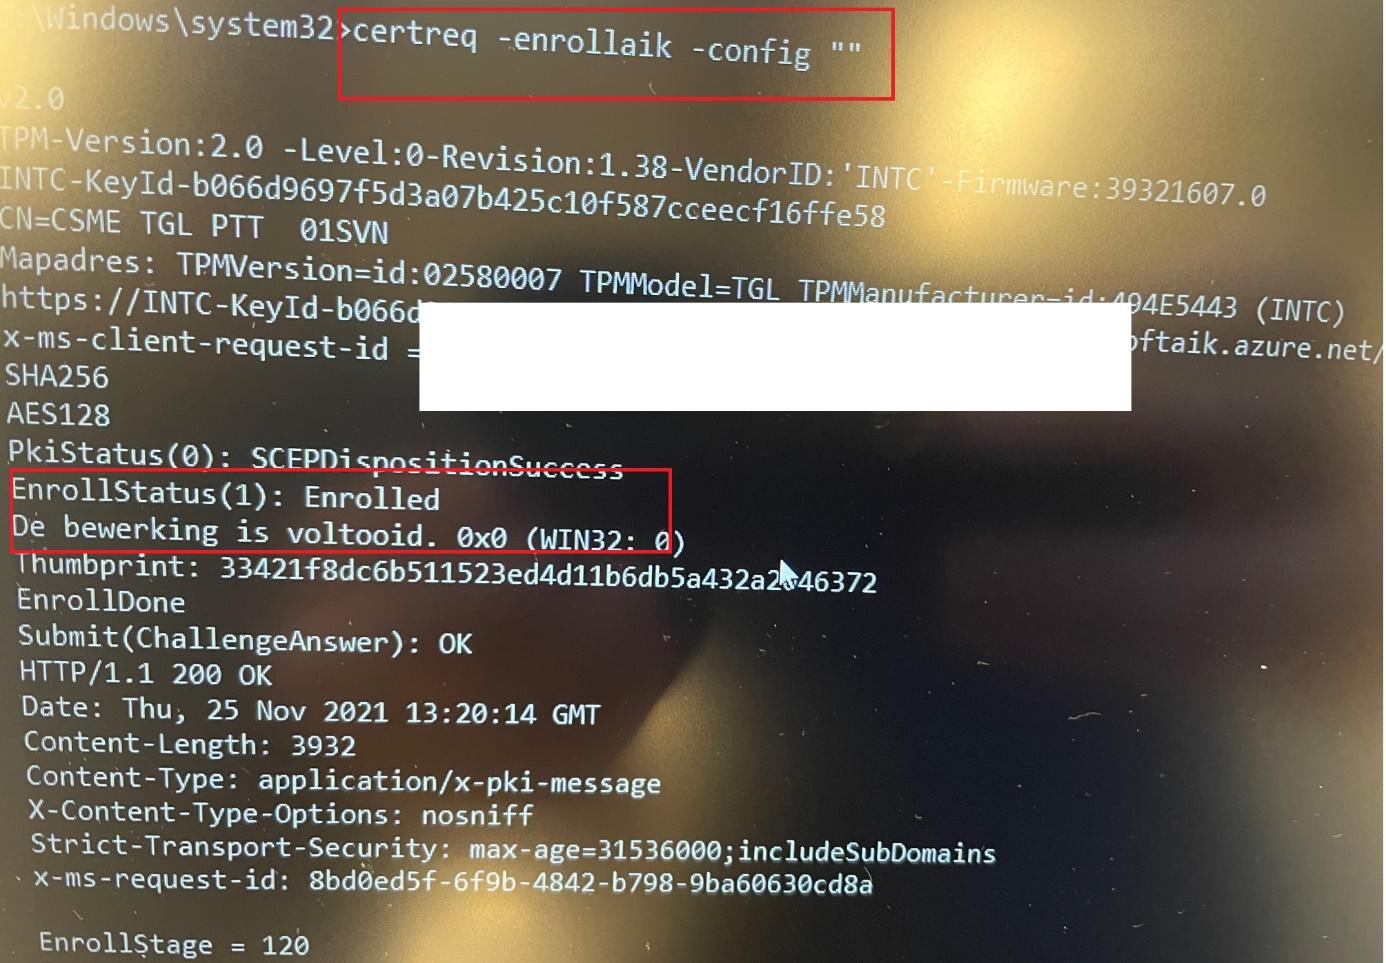
Now let’s go further and start enrolling your device. When you want to test it without enrolling the device, we could just enter this wonderful command
certreq -enrollaik -config “”
It will start the AIK Enrollment process, which was totally broken before!
Conclusion:
Now we all know what we need to do, let’s go start slipstreaming that update! 
I hope that these blogs showed you everything you need to solve the TPM issues! Go check out the other blogs in the TPM attestation series
Attestation and Compliance Series – Call4Cloud
This is all excellent, thank you! This did not work to resolve the the AMD issue so I assume that is still a work in progress. Will you post a blog when that is resolved?
Hi, of course when I am aware of the fact that Microsoft fixed it in an update I will post it
Hi, adding the KB5007262 for Windows 11, doesn’t resolve the probem.
It seems the fix for Intel Tiger lake chipsets wasn’t included in that one.
Thats odd as i really just tested it a few minutes ago :)… downloaded the latest windows 11 build and slipstreamed that update into it… works pretty fine? Just posted it on my tweet
any news? any change?
About What? the AMD issues?
yes. AMD specifically
Hi- I still have the same behavior with 21H2 Build 19044.1826. Any idea ?
What kind of device/tpm chipset do you have? Running osdcloud?